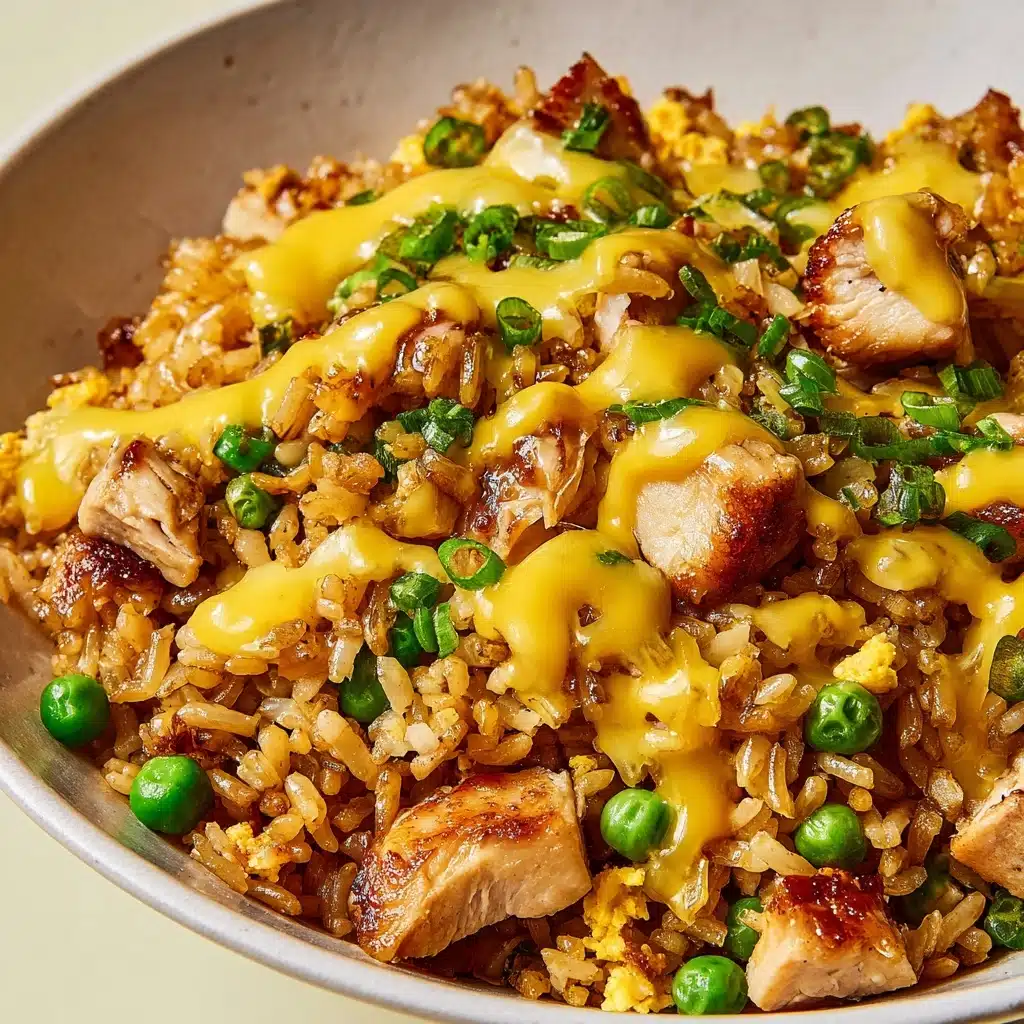
Hibachi Style Chicken Fried Rice Recipe
If you’ve ever found yourself craving the sizzling, savory goodness of restaurant-style fried rice, you’re in for a real treat! This Hibachi Style Chicken Fried Rice captures all the excitement and flavor of your favorite Japanese steakhouse, right in your own kitchen. With tender chicken, fluffy scrambled eggs, colorful veggies, and that perfect hint of butter and soy sauce, every bite is pure comfort food magic. Whether you’re feeding a family or just want a dish that’s as fun to make as it is to eat, this recipe is sure to become a go-to favorite.
Ingredients You’ll Need
Gathering the right ingredients is the first step to nailing that irresistible hibachi flavor. Each element in this Hibachi Style Chicken Fried Rice plays a crucial role—no fancy extras required, just simple staples that deliver big on taste, texture, and color.
- Vegetable oil: Key for stir-frying everything to golden perfection without imparting strong flavors.
- Boneless skinless chicken breasts: Diced small for quick cooking and juicy, bite-sized pieces in every forkful.
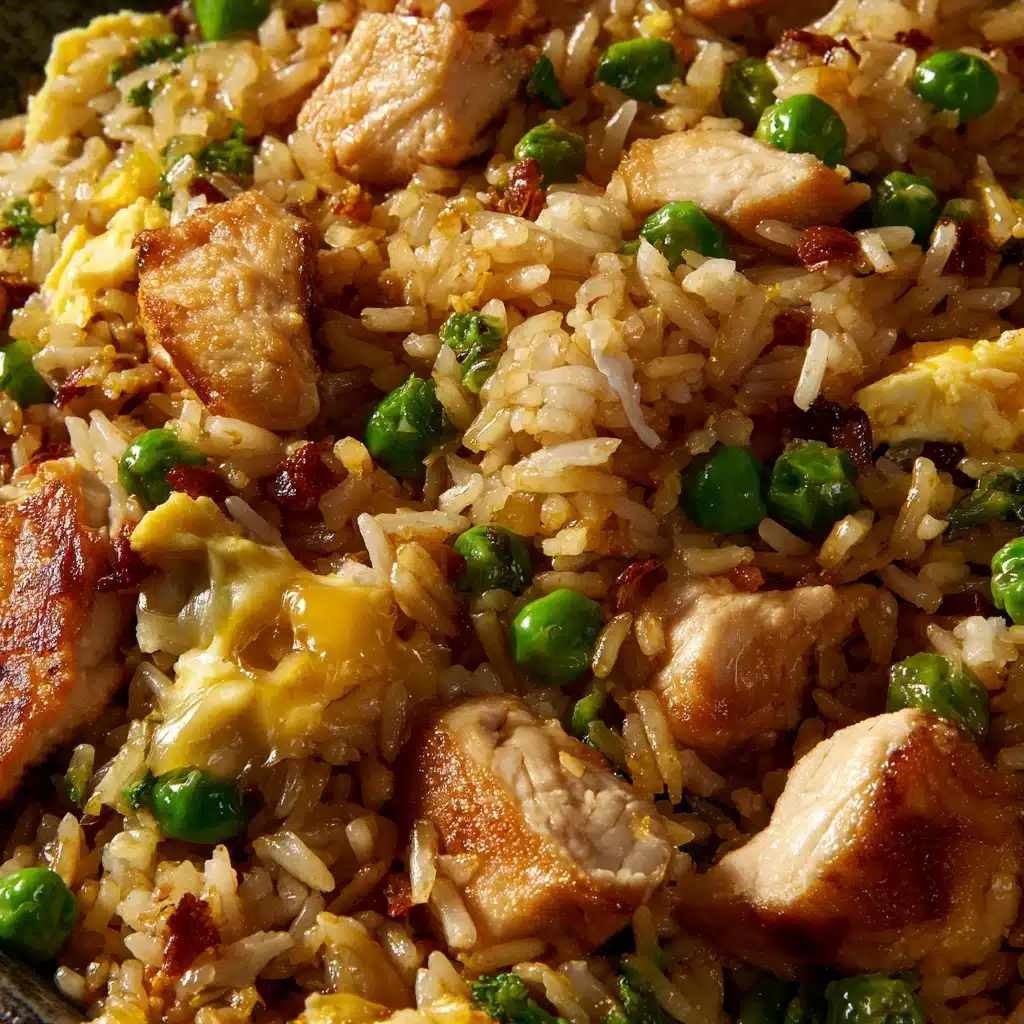
- Cold cooked white rice: Day-old rice keeps things fluffy, never mushy—essential for that classic fried rice texture!
- Large eggs: Scrambled right in the pan for richness and those signature golden ribbons throughout the rice.
- Frozen peas and carrots: Add pops of sweetness, crunch, and vibrant color—plus they’re super convenient.
- Green onions: Fresh, gently sharp, and the perfect finishing touch for flavor and color.
- Soy sauce: Delivers deep umami flavor and a gorgeous golden-brown color to the rice.
- Butter: The secret to creamy, restaurant-style richness that sets hibachi fried rice apart.
- Sesame oil: Adds a subtle, nutty aroma for that authentic hibachi flair.
- Salt and pepper: Essential for seasoning each component just right—taste and adjust as you go!
How to Make Hibachi Style Chicken Fried Rice
Step 1: Sear the Chicken
Start by heating one tablespoon of vegetable oil in a large skillet or wok over medium-high heat. Add the diced chicken and season lightly with salt and pepper. Let the chicken cook, stirring occasionally, until it’s golden brown and fully cooked through—about 5 to 6 minutes. Once done, transfer the chicken to a plate and set aside. This step builds a flavorful base for your Hibachi Style Chicken Fried Rice, so don’t rush it!
Step 2: Scramble the Eggs
With the chicken out of the pan, pour in the remaining tablespoon of oil and add your beaten eggs. Gently scramble for 1 to 2 minutes, just until they’re set but still soft. Push the eggs to one side of the pan—this classic hibachi move keeps everything neat and lets you handle the rice without overcooking the eggs.
Step 3: Fry the Rice
Add your cold, cooked rice right next to the eggs and start breaking up any clumps with your spatula. Stir-fry for about 3 to 4 minutes, letting the rice soak up all those savory flavors and get just a little crispy around the edges. The key to Hibachi Style Chicken Fried Rice is using day-old rice for the best texture, so don’t skip this tip!
Step 4: Add Vegetables
Now toss in the thawed peas and carrots. Stir everything together and continue to cook for another 2 minutes. The veggies should be heated through but still have a bit of bite, adding freshness and color to the mix.
Step 5: Combine and Finish
Return the cooked chicken to the pan, then pour in the soy sauce, add the butter, and drizzle in the sesame oil. Stir well to coat every grain of rice and piece of chicken in that savory, glossy sauce. Finish by tossing in the chopped green onions. Taste and adjust seasoning if needed, then serve your Hibachi Style Chicken Fried Rice piping hot.
How to Serve Hibachi Style Chicken Fried Rice
Garnishes
For that final flourish, sprinkle extra green onions over the top or add a light dusting of toasted sesame seeds. A drizzle of yum yum sauce or a side of pickled ginger also brings a burst of color and flavor that’s oh-so-hibachi.
Side Dishes
Pair your Hibachi Style Chicken Fried Rice with a crisp green salad, steamed edamame, or a bowl of miso soup. These sides keep things light and balanced, letting the star of the show truly shine while giving you that full Japanese steakhouse experience.
Creative Ways to Present
Try serving the rice in a hot sizzling skillet for dramatic effect, or mold it into little dome shapes using a small bowl for individual servings. Add a fun restaurant-style twist by plating alongside hibachi vegetables and a dipping sauce trio for everyone to enjoy.
Make Ahead and Storage
Storing Leftovers
Let any leftover Hibachi Style Chicken Fried Rice cool to room temperature, then store it in an airtight container in the refrigerator. It’ll stay fresh and tasty for up to 3 days, making it a perfect lunch or quick dinner option.
Freezing
If you want to make a double batch, this dish freezes beautifully! Pack cooled fried rice into resealable freezer bags or airtight containers. It’ll keep in the freezer for up to 2 months—just be sure to flatten bags for even freezing and quick thawing.
Reheating
To reheat, simply microwave individual portions with a damp paper towel over the top to keep things moist, or warm it up in a skillet with a splash of water or extra soy sauce. The flavors deepen as it sits, making leftovers just as delicious as day one.
FAQs
Can I use brown rice instead of white rice?
Absolutely! Brown rice works well and adds a nutty flavor, plus a bit more fiber. Just make sure it’s fully cooked and chilled before stir-frying for the best results in your Hibachi Style Chicken Fried Rice.
What if I don’t have day-old rice?
No worries! Spread freshly cooked rice on a baking sheet and pop it in the fridge or freezer for 30 minutes to cool and dry out. This quick trick helps mimic the texture of leftover rice and prevents your fried rice from getting mushy.
Can I substitute the chicken with something else?
Definitely! Swap in shrimp, steak, or tofu for a delicious twist. Just adjust the cooking time as needed to make sure your protein is perfectly cooked. Hibachi Style Chicken Fried Rice can easily become your own signature creation.
Is it necessary to use both butter and sesame oil?
Yes! Butter gives the rice a creamy, rich finish, while sesame oil adds that authentic hibachi aroma. Using both is what makes this dish taste just like your favorite steakhouse version.
What sauces go best with Hibachi Style Chicken Fried Rice?
Yum yum sauce and ginger sauce are classic choices, but don’t be afraid to get creative with a little sriracha mayo or even spicy mustard. These sauces add extra flavor and fun to every bite.
Final Thoughts
There’s nothing quite like making Hibachi Style Chicken Fried Rice at home—it’s quick, satisfying, and packed with all the flavors you love. Give it a try, and you’ll see just how easy it is to bring a bit of restaurant magic to your own table. Happy cooking!
Print
Hibachi Style Chicken Fried Rice Recipe
- Total Time: 25 minutes
- Yield: 4 servings 1x
- Diet: Non-Vegetarian
Description
This Hibachi Style Chicken Fried Rice is a delicious and easy-to-make Japanese-American dish that combines tender diced chicken, savory soy sauce, fresh vegetables, and perfectly cooked rice. Ideal for a quick dinner, it replicates the classic hibachi grill flavors right in your own kitchen.
Ingredients
Protein
- 1 lb boneless skinless chicken breasts (diced)
- 2 large eggs (beaten)
Vegetables & Rice
- 4 cups cold cooked white rice (preferably day-old)
- 1 cup frozen peas and carrots (thawed)
- 3 green onions (chopped)
Oils & Sauces
- 2 tablespoons vegetable oil (divided)
- 3 tablespoons soy sauce
- 1 tablespoon butter
- 1 teaspoon sesame oil
Seasonings
- Salt and pepper to taste
Instructions
- Cook the Chicken: Heat 1 tablespoon of vegetable oil in a large skillet or wok over medium-high heat. Add the diced chicken and season lightly with salt and pepper. Cook for 5–6 minutes, stirring occasionally, until golden brown and fully cooked. Remove the chicken from the pan and set aside.
- Scramble the Eggs: Add the remaining tablespoon of oil to the pan. Pour in the beaten eggs and scramble for 1–2 minutes until fully cooked. Push the eggs to one side of the pan to make space for the rice.
- Fry the Rice and Vegetables: Add the cold cooked rice to the pan. Stir-fry the rice for 3–4 minutes, breaking up any clumps. Add the thawed peas and carrots and continue to stir-fry for another 2 minutes to heat through.
- Combine Ingredients and Season: Return the cooked chicken to the pan. Add soy sauce, butter, and sesame oil. Stir everything together until well coated and heated through.
- Add Green Onions and Serve: Toss in the chopped green onions, adjust seasoning with salt and pepper if needed. Serve immediately while hot for the best flavor.
Notes
- For best texture, use cold, leftover rice to prevent mushiness.
- You can swap chicken for shrimp, steak, or tofu as alternatives.
- Serve with yum yum sauce or ginger sauce for an authentic hibachi experience.
- Adjust soy sauce quantity to taste if you prefer less sodium.
- Day-old rice works best as it is drier and fries better than freshly cooked rice.
- Prep Time: 10 minutes
- Cook Time: 15 minutes
- Category: Main Course
- Method: Stir-Fry
- Cuisine: Japanese-American
Nutrition
- Serving Size: 1 ½ cups
- Calories: 420
- Sugar: 3g
- Sodium: 700mg
- Fat: 18g
- Saturated Fat: 5g
- Unsaturated Fat: 11g
- Trans Fat: 0g
- Carbohydrates: 38g
- Fiber: 2g
- Protein: 27g
- Cholesterol: 125mg


