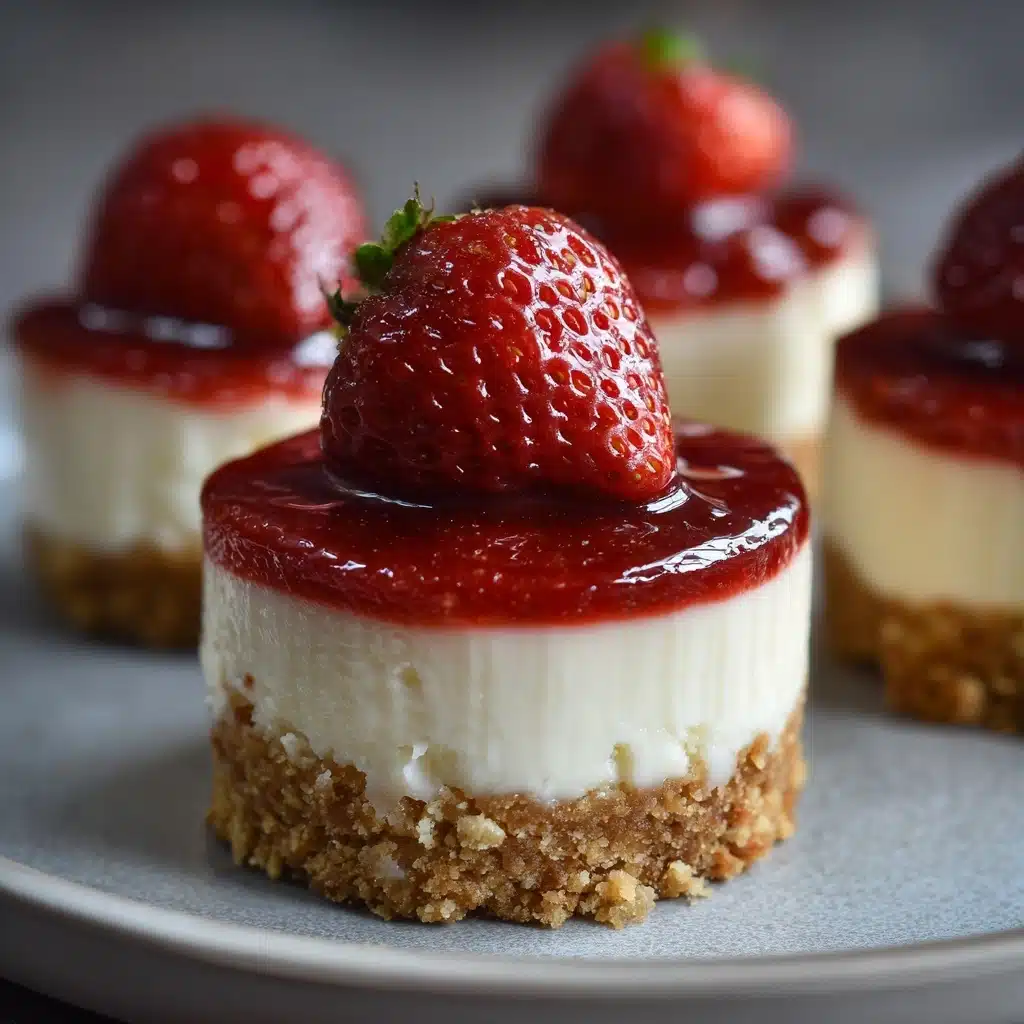
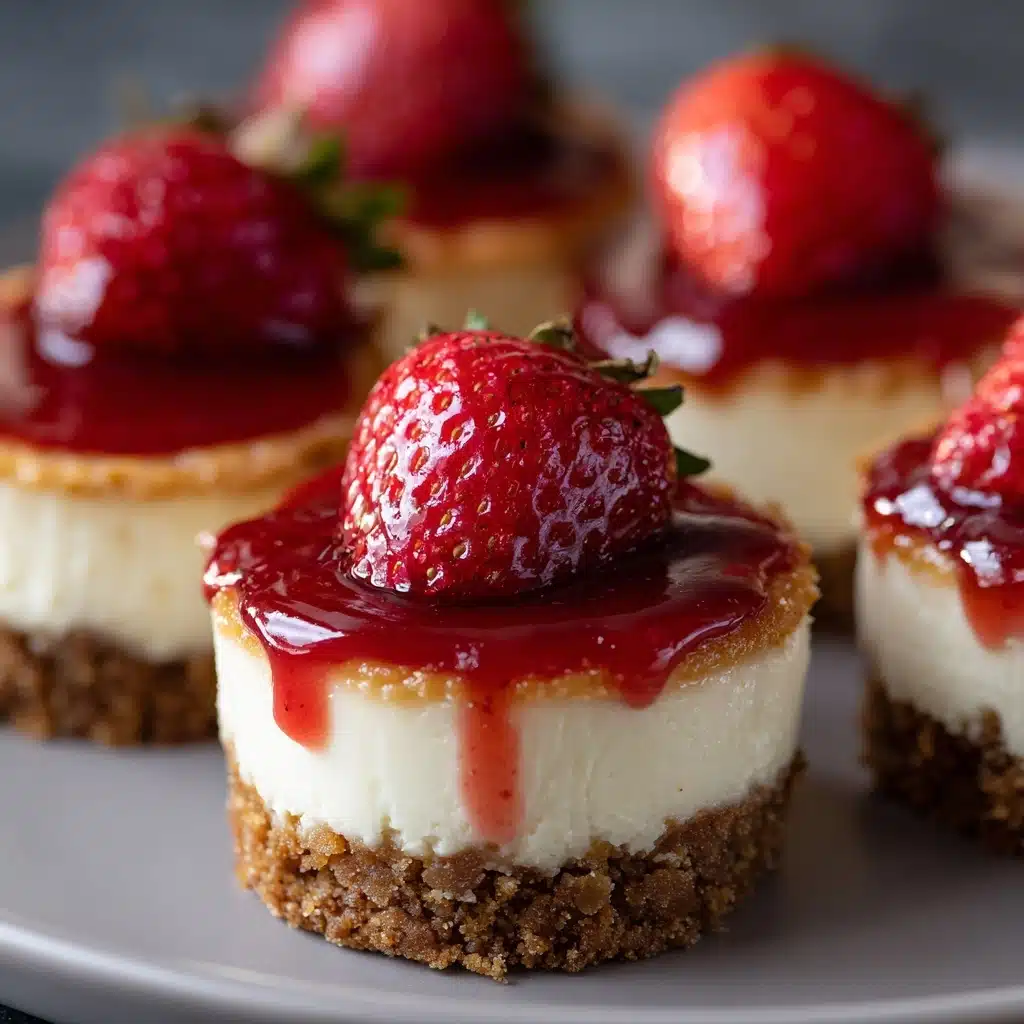
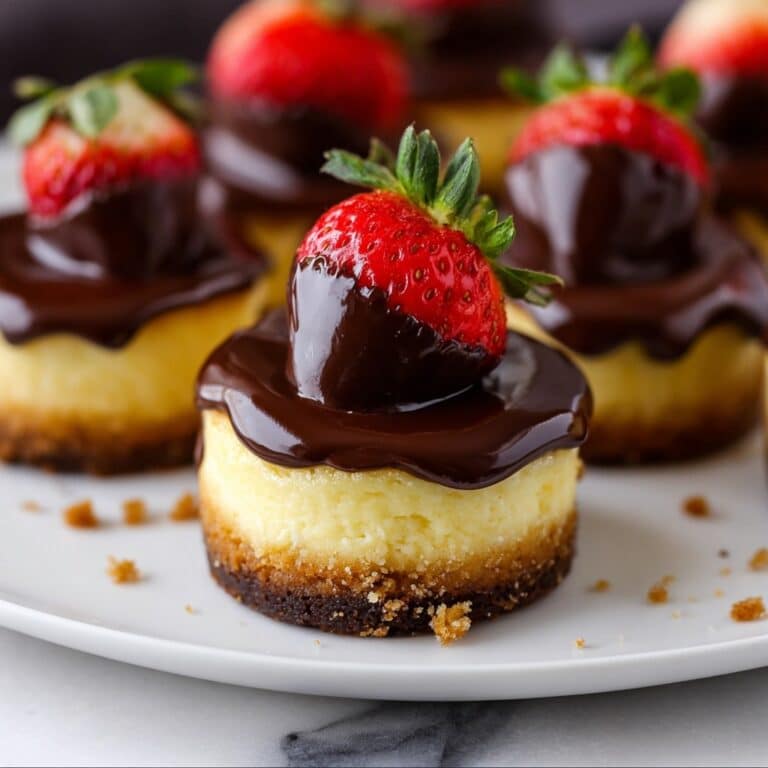
Mini Cheesecakes with Vanilla Wafer Crust Recipe
If you’re looking for a sweet bite-sized treat that combines creamy, dreamy cheesecake with a buttery cookie base, Mini Cheesecakes with Vanilla Wafer Crust are the answer! These adorable little cheesecakes are the perfect dessert for parties, gatherings, or anytime you crave a little indulgence. Each one features a crisp vanilla wafer crust and a luxuriously smooth cheesecake filling, topped off with your favorite fresh berries or a dollop of whipped cream. They’re just the right size for sharing (or not!) and look as delightful as they taste.
Ingredients You’ll Need
The beauty of Mini Cheesecakes with Vanilla Wafer Crust is that they require simple ingredients you probably already have. Each component plays its own delicious role, from the sweet crunch of the crust to the creamy tang of the filling. Here’s what you’ll need and why each item matters:
- Vanilla wafer crumbs: These cookies create a nostalgic, buttery crust that’s the perfect foundation for your cheesecakes.
- Granulated sugar: Adds sweetness to both the crust and the filling, balancing flavors beautifully.
- Butter, melted: Helps bind the crust together and gives it that irresistible richness.
- Cream cheese, softened: The star of the show! Softened cream cheese ensures a smooth, lump-free filling.
- Vanilla extract: Just a splash infuses the filling with warm, aromatic notes.
- Large eggs: Bind the filling and contribute to the luscious, creamy texture.
- Sour cream: Adds a subtle tang and extra silkiness to the cheesecake batter.
- All-purpose flour (optional): Use this for extra firmness if you prefer a sturdier bite (totally optional!).
- Fresh berries, whipped cream, or fruit compote: These are your finishing touches for a pop of color and flavor.
How to Make Mini Cheesecakes with Vanilla Wafer Crust
Step 1: Preheat the Oven and Prep the Pan
Begin by setting your oven to 325°F (163°C) so it’s hot and ready when you are. Line a muffin tin with paper liners, which helps the mini cheesecakes pop out easily later and keeps cleanup a breeze.
Step 2: Prepare the Crust
In a medium bowl, combine the vanilla wafer crumbs and sugar, then drizzle in the melted butter. Give everything a thorough mix until it’s evenly moistened. Scoop about 1 tablespoon of this mixture into each muffin liner, then use your fingers or the bottom of a small glass to press it down firmly. This forms the crunchy, flavorful base for your Mini Cheesecakes with Vanilla Wafer Crust.
Step 3: Bake the Crust
Pop the muffin tin into the oven and bake the crusts for 8 to 10 minutes, just until they’re lightly golden and fragrant. Once done, take them out and let them cool while you whip up the creamy filling.
Step 4: Prepare the Cheesecake Filling
In a large mixing bowl, beat the softened cream cheese until it’s silky smooth—no lumps here! Add the sugar and vanilla extract, mixing until fully blended. Then, add the eggs one at a time, beating well after each addition. Stir in the sour cream and flour (if using) to finish off this rich, luscious batter.
Step 5: Fill the Cups
Spoon the cheesecake filling over the cooled crusts, filling each muffin cup nearly to the top. The smooth batter will settle nicely, promising creamy results in every bite.
Step 6: Bake the Cheesecakes
Return the pan to the oven and bake for 18 to 20 minutes. You’re looking for the centers to be just set and the tops to take on a gentle golden hue. Let them cool in the pan for about 10 minutes, then transfer each cheesecake to a wire rack to cool completely.
Step 7: Chill
Once cooled, pop your Mini Cheesecakes with Vanilla Wafer Crust into the fridge for at least 2 hours. This lets them firm up and makes them extra creamy and satisfying.
Step 8: Serve
When you’re ready to serve, top each cheesecake with fresh berries, a swirl of whipped cream, or a spoonful of fruit compote. Each bite is pure happiness!
How to Serve Mini Cheesecakes with Vanilla Wafer Crust
Garnishes
The crowning glory of these mini beauties is whatever you decide to put on top! Fresh berries like strawberries, blueberries, or raspberries add color and a burst of tartness, while whipped cream brings a light, airy touch. For a little extra flair, try a drizzle of fruit compote or chocolate sauce—there’s no wrong way to finish Mini Cheesecakes with Vanilla Wafer Crust.
Side Dishes
Since these cheesecakes are naturally rich and creamy, they pair wonderfully with a big bowl of fresh fruit salad or a platter of crisp, buttery cookies. If you’re serving them at a party, consider offering coffee or herbal tea alongside to balance the sweetness and create a cozy dessert spread.
Creative Ways to Present
You can serve your Mini Cheesecakes with Vanilla Wafer Crust on a tiered dessert stand for a show-stopping centerpiece, or nestle each one in colorful cupcake wrappers for a playful pop. For special occasions, arrange them on individual plates with an artful swipe of sauce or a sprinkle of edible flowers—guests will be wowed by your attention to detail!
Make Ahead and Storage
Storing Leftovers
Leftover Mini Cheesecakes with Vanilla Wafer Crust keep beautifully in the fridge. Simply place them in an airtight container and store for up to five days. The flavors just get better, making them a wonderful treat to enjoy throughout the week.
Freezing
If you want to prepare these cheesecakes in advance, you’re in luck! Mini Cheesecakes with Vanilla Wafer Crust freeze well. Place the cooled cheesecakes (without toppings) on a baking sheet, freeze until solid, then transfer to a freezer-safe container. They’ll keep for up to two months—just thaw overnight in the fridge before serving.
Reheating
There’s no need to reheat these cheesecakes; in fact, they’re best enjoyed chilled. If you’re taking them straight from the freezer, let them thaw in the refrigerator for a few hours or overnight. Add your garnishes just before serving for the freshest flavor and texture.
FAQs
Can I use a different type Dessert
Absolutely! While vanilla wafers create that classic flavor, graham crackers, shortbread cookies, or even chocolate wafers can be used for a fun twist on Mini Cheesecakes with Vanilla Wafer Crust.
What’s the best way to get the cheesecakes out of the muffin tin?
Using paper liners is key for easy removal. Let the cheesecakes cool completely before lifting them out; if needed, gently run a knife around the edge of each liner to help release them.
Can I make these mini cheesecakes gluten-free?
Yes! Just swap the vanilla wafer crumbs for your favorite gluten-free cookies and use gluten-free flour or skip it entirely. The rest of the Mini Cheesecakes with Vanilla Wafer Crust recipe is naturally gluten-free.
Why did my cheesecakes crack?
Cracks can happen if the cheesecakes are overbaked or cool too quickly. Be sure to bake just until set and let them cool gradually. The good news? Toppings like berries or whipped cream easily hide any imperfections!
Can I double the recipe for a bigger crowd?
Definitely! Just double all the ingredients and use two muffin tins. Baking time may need a slight adjustment, so keep an eye on them and test for doneness by gently jiggling the pan.
Final Thoughts
If you’re looking for a dessert that’s as fun to make as it is to eat, give Mini Cheesecakes with Vanilla Wafer Crust a try. With their creamy filling, crisp cookie base, and endless topping options, they’re sure to become a favorite for any occasion. Gather your ingredients, invite some friends to help decorate, and let the cheesecake magic begin!
Print
Mini Cheesecakes with Vanilla Wafer Crust Recipe
- Total Time: 2 hours 43 minutes
- Yield: 12 servings 1x
- Diet: Vegetarian
Description
These Mini Cheesecakes with Vanilla Wafer Crust are delightful individual-sized desserts, combining a buttery vanilla wafer crust with a smooth, creamy cheesecake filling. Perfectly portioned and topped with fresh berries or whipped cream, they are ideal for parties or a sweet treat anytime.
Ingredients
Crust Ingredients
- 1 ½ cups vanilla wafer crumbs (about 20–25 wafers)
- 2 tbsp granulated sugar
- 6 tbsp butter, melted
Cheesecake Filling
- 16 oz cream cheese, softened
- ½ cup granulated sugar
- 1 tsp vanilla extract
- 2 large eggs
- ½ cup sour cream
- 2 tbsp all-purpose flour (optional, for extra firmness)
Toppings (Optional)
- Fresh berries
- Whipped cream
- Fruit compote
Instructions
- Preheat the Oven: Preheat your oven to 325°F (163°C). Line a muffin tin with paper liners to prevent sticking and for easy removal.
- Prepare the Crust: In a bowl, combine the vanilla wafer crumbs and granulated sugar. Pour in the melted butter and stir until the mixture is evenly moistened. Press about 1 tablespoon of this crust mixture firmly into the bottom of each muffin tin liner to create the base.
- Bake the Crust: Place the muffin tin in the oven and bake the crusts for 8-10 minutes or until they turn golden brown. Remove from the oven and allow them to cool while you prepare the cheesecake filling.
- Prepare the Cheesecake Filling: In a large bowl, beat the softened cream cheese until it is smooth and free of lumps. Add the sugar and vanilla extract, then continue beating until the mixture is fully blended and creamy. Add the eggs one by one, mixing well after each addition to incorporate them evenly. Finally, fold in the sour cream and, if desired, the flour to help the filling set firmer.
- Fill the Cups: Spoon the cheesecake filling over the cooled crusts in each muffin liner, filling them nearly to the top but leaving a small gap to prevent overflow.
- Bake the Cheesecakes: Bake the mini cheesecakes for 18-20 minutes, or until the centers are set but still slightly jiggly. The tops should be lightly golden. Once baked, leave them to cool in the pan for about 10 minutes, then transfer them to a wire rack to cool completely.
- Chill: Refrigerate the cheesecakes for at least 2 hours to allow them to firm up fully before serving.
- Serve: Just before serving, top the mini cheesecakes with fresh berries, whipped cream, or a fruit compote of your choice for added flavor and presentation.
Notes
- You can make the crust ahead and store it in the fridge for up to 2 days before baking.
- For firmer mini cheesecakes, include the 2 tablespoons of flour in the filling mixture.
- Use full-fat cream cheese and sour cream for the best creamy texture and flavor.
- Mini cheesecakes can be stored covered in the refrigerator for up to 4 days.
- Feel free to experiment with different toppings like caramel sauce or chocolate drizzle.
- Prep Time: 15 minutes
- Cook Time: 28 minutes
- Category: Dessert
- Method: Baking
- Cuisine: American
Nutrition
- Serving Size: 1 mini cheesecake
- Calories: 250 kcal
- Sugar: 18 g
- Sodium: 140 mg
- Fat: 18 g
- Saturated Fat: 11 g
- Unsaturated Fat: 5 g
- Trans Fat: 0.3 g
- Carbohydrates: 16 g
- Fiber: 0.5 g
- Protein: 5 g
- Cholesterol: 70 mg


