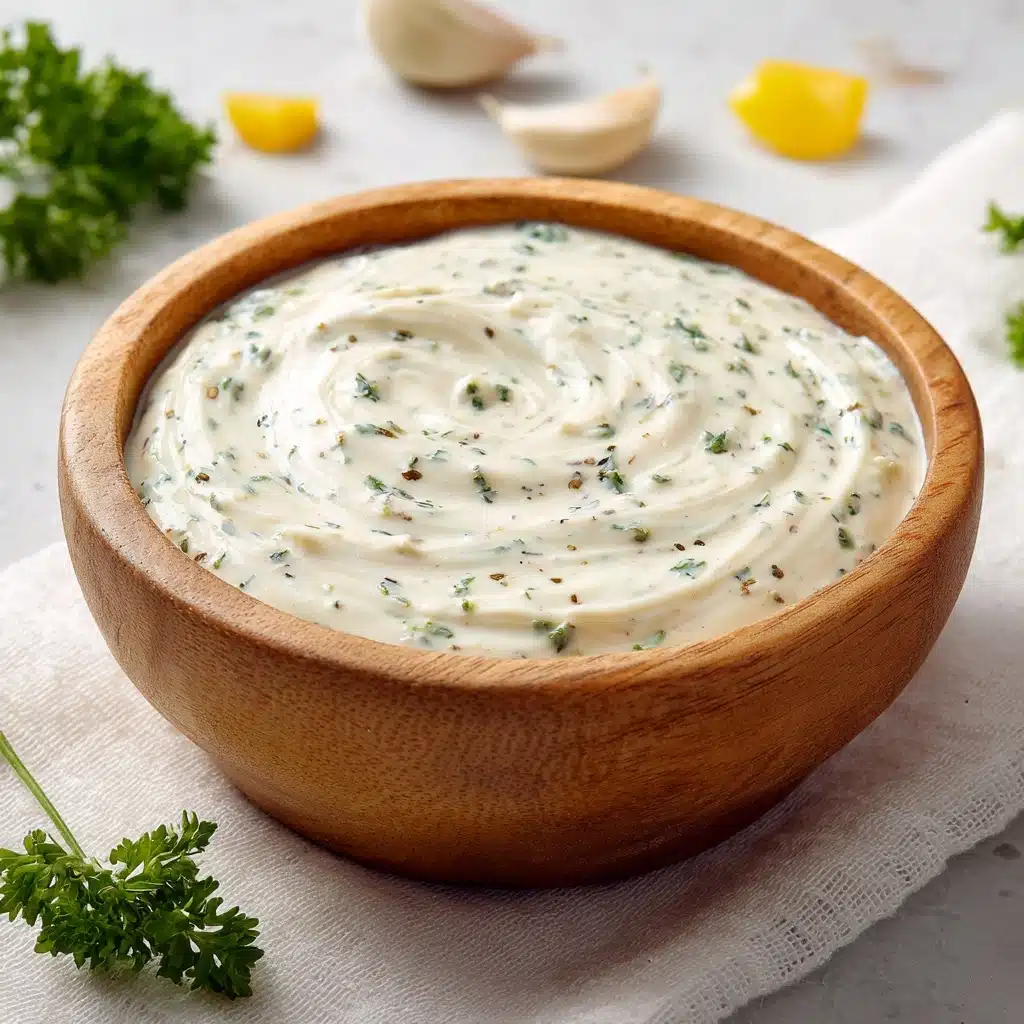
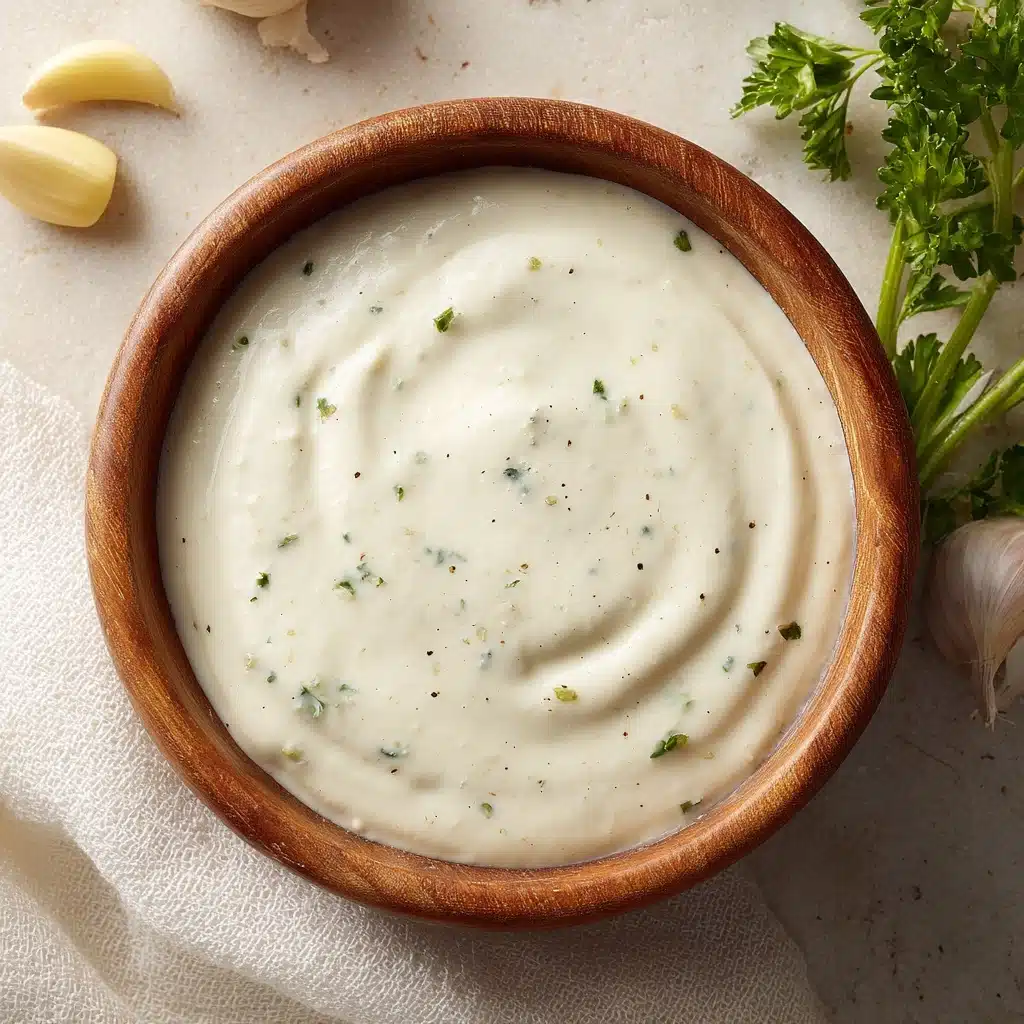
Creamy Garlic Aioli Recipe
If you’ve ever dreamed of elevating your fries, burgers, or roasted veggies with a dip that absolutely sings with flavor, Creamy Garlic Aioli is the magic you’ve been seeking. This Mediterranean staple is all about rich, tangy, garlicky goodness wrapped up in a silky, mayonnaise-based sauce that’s surprisingly simple to whip up at home. Once you taste fresh aioli, you’ll find a dozen ways to drizzle, dip, and dollop it around your kitchen. Let’s be honest—there’s nothing quite as satisfying as knowing you made the best condiment on the table from scratch!
Ingredients You’ll Need
Creamy Garlic Aioli might sound fancy, but the real secret is in its handful of hardworking, everyday ingredients. Each one plays a unique role, from building creamy texture to adding vibrant zing or a peppery kick. Fresh, high-quality items ensure your aioli turns out boldly flavored and irresistibly smooth every single time.
- Mayonnaise: The creamy base that ties everything together and creates that luscious texture we love.
- Garlic (3 cloves, minced or mashed into a paste): The star ingredient—fresh garlic brings its unmistakable flavor and aromatic punch.
- Lemon Juice: Adds brightness and a tangy note that balances the richness of the aioli.
- Dijon Mustard: Gives subtle heat and complexity, rounding out the flavor profile beautifully.
- Salt: Just enough to enhance all the other tastes without overpowering.
- Black Pepper: Brings a touch of gentle sharpness and depth to the mix.
How to Make Creamy Garlic Aioli
Step 1: Prep Your Garlic
Start by mincing your garlic as finely as possible or, even better, mashing it into a paste using the flat side of your knife and a pinch of salt. This method helps mellow the bite of raw garlic while letting all those essential oils release directly into your Creamy Garlic Aioli for a more intense, harmonious flavor.
Step 2: Combine the Ingredients
In a small bowl, add your mayonnaise, garlic, lemon juice, Dijon mustard, salt, and black pepper. This is where the magic begins—the union of these simple ingredients creates a base that’s velvety smooth and packed with personality. Don’t rush this part; savor the moment as you see all the colors coming together.
Step 3: Whisk Until Smooth
Grab a whisk (or a sturdy fork in a pinch) and blend everything together until the mixture is completely smooth and well combined. A good whisking ensures your Creamy Garlic Aioli has a perfectly blended texture, without any streaks or lumps of flavor hiding in the corners.
Step 4: Taste and Fine-Tune
Give your aioli a taste. Does it need a touch more lemon for brightness or a bit more garlic for kick? This is your golden opportunity to make it truly yours. Adjust the seasonings to your liking, knowing that the flavors will further deepen as it rests.
Step 5: Chill for Best Flavor
Cover your aioli and let it chill in the refrigerator for at least 30 minutes—if you can wait! The cold melds everything together, beautifully intensifying that signature Creamy Garlic Aioli flavor. Trust me, the extra patience is worth every minute.
How to Serve Creamy Garlic Aioli
Garnishes
A sprinkle of finely chopped fresh parsley, a dusting of smoked paprika, or a few twists of cracked black pepper make Creamy Garlic Aioli look as irresistible as it tastes. Not only do garnishes add pops of color, but they offer enticing aromas and the perfect finishing touch.
Side Dishes
This dreamy condiment is destined for more than just fries! Creamy Garlic Aioli is absolute magic alongside roasted potatoes, grilled veggies, crispy chicken tenders, or even dolloped onto steamed artichokes. It turns every side into the star of the meal.
Creative Ways to Present
Don’t be shy about using this aioli as a spread for sandwiches, wraps, or burgers. For playful entertaining, try spooning it into small ramekins for dunking, or drizzling it artistically in squiggles over a platter of grilled seafood. Let Creamy Garlic Aioli inspire your plating—there’s no wrong way to enjoy it!
Make Ahead and Storage
Storing Leftovers
Leftover Creamy Garlic Aioli stores beautifully in an airtight container in the fridge for up to four days. The flavors actually get even better as they mingle, so don’t be afraid to make it ahead or stash away any extra for tomorrow’s lunch!
Freezing
While freezing isn’t ideal for mayonnaise-based sauces due to texture changes, you can technically freeze Creamy Garlic Aioli in a pinch. Just know the emulsion may break as it thaws, so you’ll need to whisk it vigorously to bring it back together, and the texture may not be quite as plush as fresh.
Reheating
It’s best enjoyed cold or at room temperature, straight from the fridge. If you want to take the chill off, let the Creamy Garlic Aioli sit out for about 10 minutes before serving. Avoid microwaving—heat will separate the emulsion and compromise the creamy consistency.
FAQs
Can I make Creamy Garlic Aioli without mayonnaise?
Absolutely! Try using plain Greek yogurt for a lighter, tangier version, or even blend silken tofu for a vegan twist. The flavor and texture will be a little different, but it will still be delicious.
How do I make my aioli extra garlicky?
For a bolder garlic punch, simply add an extra clove or let the mixture chill longer, allowing all that delicious garlic flavor to infuse more deeply throughout your Creamy Garlic Aioli.
Is there a way to make Creamy Garlic Aioli healthier?
Definitely! Substitute half (or all) of the mayo with Greek yogurt to cut back on fat and calories while boosting protein. You’ll still get the creamy texture and garlic kick, just with a lighter feel.
What can I do if my aioli is too thick?
If your Creamy Garlic Aioli turns out a little too thick for your liking, simply whisk in a teaspoon or two of water or extra lemon juice until you reach your perfect consistency.
Can I use pre-minced garlic from the jar?
While fresh garlic gives the most vibrant taste, jarred minced garlic will work in a pinch. Just be aware the flavor may be a bit mellower and less punchy than freshly mashed cloves.
Final Thoughts
Once you try this homemade Creamy Garlic Aioli, there’s just no going back to the jarred stuff—it’s rich, garlicky, and downright addictive. I hope you give it a whirl, play around with your own twists, and let it become your new secret weapon for effortless flavor. Enjoy every dip!
Print
Creamy Garlic Aioli Recipe
- Total Time: 5 minutes (plus chilling)
- Yield: 8 servings
- Diet: Gluten-Free, Vegetarian
Description
Indulge in the rich, creamy goodness of this homemade Creamy Garlic Aioli. With just a few simple ingredients, you can elevate any dish with this flavorful condiment.
Ingredients
Mayonnaise:
1 cup
Garlic:
3 cloves, minced or mashed into a paste
Lemon Juice:
1 tablespoon
Dijon Mustard:
1 teaspoon
Salt:
1/4 teaspoon
Black Pepper:
1/8 teaspoon
Instructions
- Combine Ingredients: In a small bowl, whisk together mayonnaise, garlic, lemon juice, Dijon mustard, salt, and pepper until smooth.
- Adjust Seasoning: Taste and adjust seasoning as desired.
- Chill: Cover and refrigerate for at least 30 minutes before serving.
Notes
- For a stronger garlic flavor, chill longer or add an extra clove.
- For a lighter version, substitute half the mayo with Greek yogurt.
- Great as a dip, spread, or burger sauce.
- Prep Time: 5 minutes
- Cook Time: 0 minutes
- Category: Condiment
- Method: No-Cook
- Cuisine: Mediterranean
Nutrition
- Serving Size: 2 tablespoons
- Calories: 110
- Sugar: 0g
- Sodium: 150mg
- Fat: 12g
- Saturated Fat: 2g
- Unsaturated Fat: 9g
- Trans Fat: 0g
- Carbohydrates: 1g
- Fiber: 0g
- Protein: 0g
- Cholesterol: 10mg


