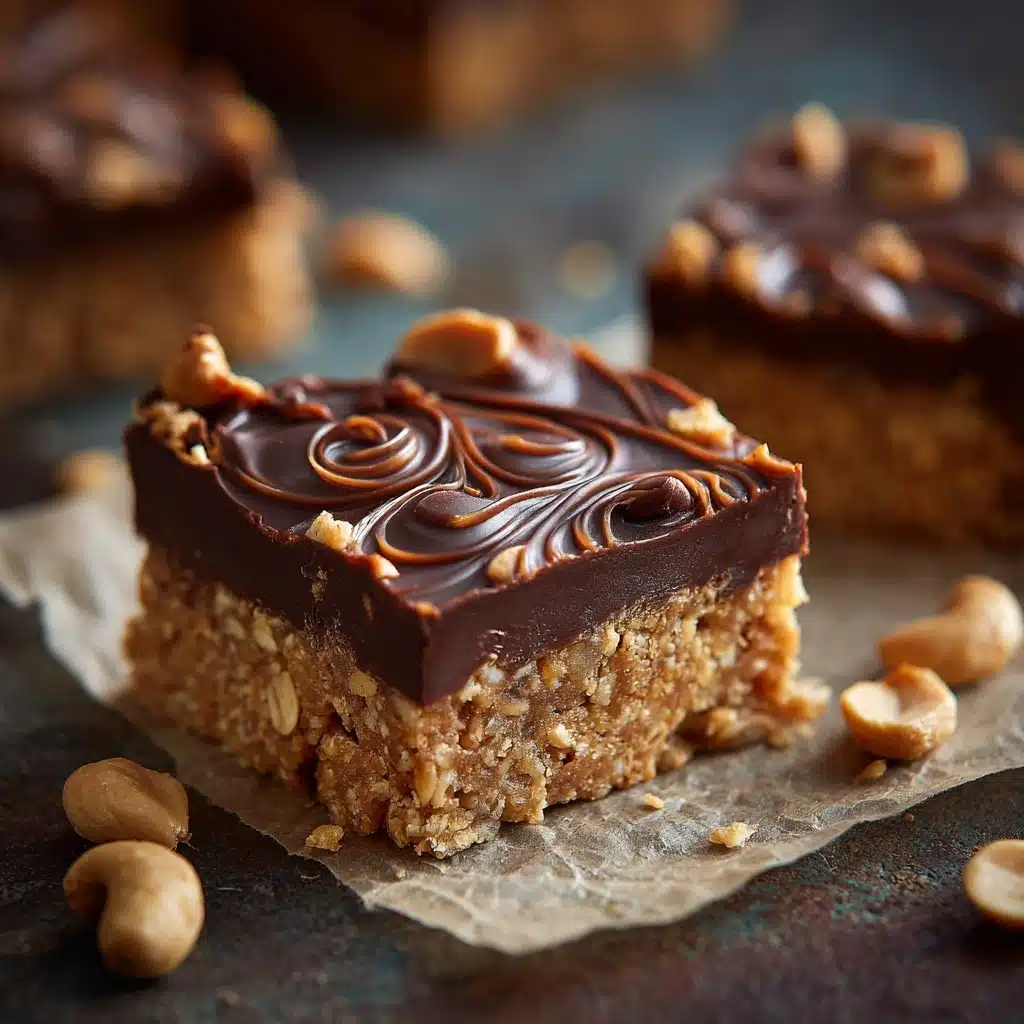
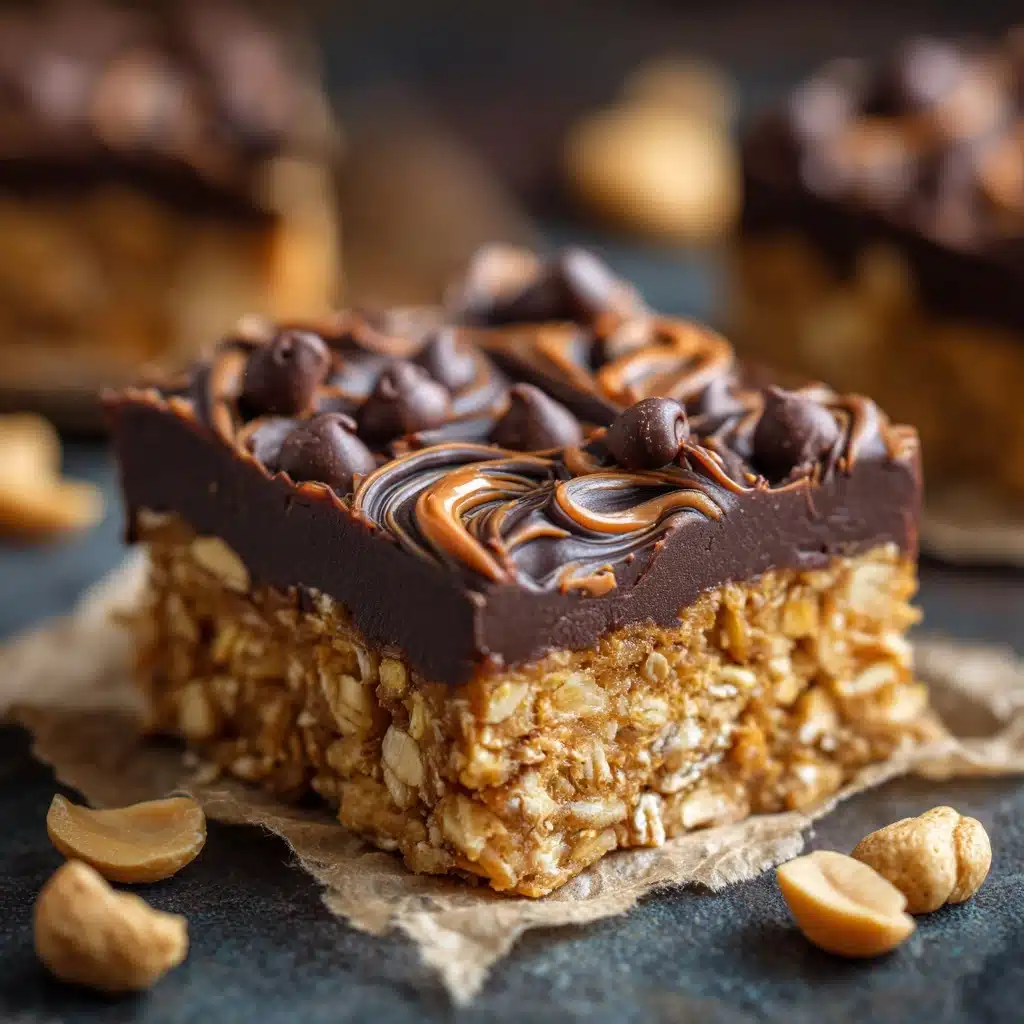
Healthy No-Bake Chocolate Peanut Butter Crunch Bars Recipe
If you’re searching for that perfect treat to curb your sweet tooth without turning on the oven, you’re about to fall in love with these Healthy No-Bake Chocolate Peanut Butter Crunch Bars. Each bite delivers a delightful mix of creamy peanut butter, luscious dark chocolate, and the irresistible crunch of crispy rice cereal. The best part? They’re made with wholesome ingredients and can be whipped up in minutes, making them the ultimate snack or dessert for busy days, after-school cravings, or anytime you need a little pick-me-up that feels indulgent but is secretly good for you!
Ingredients You’ll Need
You’ll be amazed at how a handful of pantry staples come together to create something this delicious. Each ingredient plays a special role in making these bars so memorable, from the nutty richness of peanut butter to the satisfying snap of crispy rice cereal and the decadent chocolate topping.
- Natural peanut butter: Choose creamy or crunchy for your preferred texture—peanut butter is the base that brings everything together.
- Maple syrup or honey: These natural sweeteners add the perfect touch of sweetness and help bind the bars.
- Coconut oil: Keeps the bars soft and adds a subtle tropical flavor that pairs beautifully with chocolate and peanut butter.
- Vanilla extract: Just a splash enhances the overall flavor and brings warmth to every bite.
- Crispy rice cereal: The secret to that addictively crunchy texture—make sure to use gluten-free if needed.
- Salt: A pinch balances out the sweetness and highlights the chocolate and peanut butter flavors.
- Dark chocolate chips: Go for a higher cocoa content for a richer, more satisfying chocolate layer.
- Coconut oil (for melting chocolate): Makes the chocolate layer silky smooth and easy to slice.
- Flaky sea salt (optional): An irresistible finishing touch that makes the chocolate flavor pop.
How to Make Healthy No-Bake Chocolate Peanut Butter Crunch Bars
Step 1: Prepare Your Pan
Start by lining an 8×8-inch baking pan with parchment paper, leaving some overhang for easy removal later. This little step makes a world of difference when it’s time to lift out and slice your bars, and it keeps cleanup a breeze.
Step 2: Melt the Peanut Butter Base
In a medium saucepan over low heat, gently combine the peanut butter, maple syrup (or honey), and coconut oil. Stir continuously until the mixture is completely smooth, glossy, and everything is melted together—about 2 to 3 minutes. Be sure to keep the heat low so nothing scorches, and breathe in that heavenly aroma!
Step 3: Add Flavor and Crunch
Remove the saucepan from the heat and stir in the vanilla extract and salt. Next, gently fold in the crispy rice cereal, making sure every piece is coated in that luscious peanut butter mixture. Work slowly and use a spatula to avoid crushing the cereal—this ensures every bite is perfectly crunchy.
Step 4: Press and Set the Base
Transfer the mixture to your prepared pan and press it firmly and evenly into the corners. You can use a spatula, a piece of parchment, or even your (clean) hands to get it nice and compact. This step ensures your bars hold together beautifully and have that signature crunch.
Step 5: Make the Chocolate Topping
In a small microwave-safe bowl or using a double boiler, melt the dark chocolate chips together with 1 tablespoon of coconut oil. Heat in short bursts and stir frequently until the chocolate is smooth and glossy—don’t rush this step, as patience yields the silkiest topping!
Step 6: Assemble and Chill
Pour the melted chocolate over the peanut butter base. Use a spatula to spread it evenly to the edges. If you love a little salty-sweet magic, sprinkle with flaky sea salt before chilling. Pop the pan into the refrigerator for at least 1 to 2 hours, or until the bars are set and firm to the touch.
Step 7: Slice and Enjoy
Once chilled and set, lift the whole slab out of the pan using the parchment overhang. Place on a cutting board and slice into 16 bars using a sharp knife, wiping the blade between cuts for clean edges. Now, all that’s left is to savor your Healthy No-Bake Chocolate Peanut Butter Crunch Bars!
How to Serve Healthy No-Bake Chocolate Peanut Butter Crunch Bars
Garnishes
A sprinkle of flaky sea salt on top not only looks beautiful but also enhances the chocolate and peanut butter flavors. For an extra-special touch, try adding a dusting of cocoa powder, crushed roasted peanuts, or a drizzle of melted white chocolate before chilling.
Side Dishes
These bars pair wonderfully with a tall glass of almond milk, your favorite hot coffee, or a frosty smoothie. For a more decadent dessert spread, serve alongside fresh berries or a fruit salad—the tartness balances the rich chocolate and peanut butter.
Creative Ways to Present
Cut the bars into bite-sized squares and arrange them on a platter for parties, or wrap them individually in parchment and tie with twine for the cutest homemade snack gifts. Stack them in a mason jar for a fun, portable treat, or layer with yogurt and berries in a parfait glass for a show-stopping dessert.
Make Ahead and Storage
Storing Leftovers
Store your Healthy No-Bake Chocolate Peanut Butter Crunch Bars in an airtight container in the refrigerator. They’ll stay fresh and satisfyingly crisp for up to one week—if they last that long! The chilled chocolate also keeps the bars from getting too soft.
Freezing
For longer storage, these bars freeze beautifully. Simply layer them between sheets of parchment in a freezer-safe container, and they’ll keep for up to three months. Just let them sit at room temperature for a few minutes before enjoying for the perfect texture.
Reheating
No reheating needed! If you prefer a softer bite, set a bar out at room temperature for 5-10 minutes before eating. Otherwise, enjoy them straight from the fridge or freezer for maximum crunch.
FAQs
Can I make these bars nut-free?
Absolutely! Swap the peanut butter for sunflower seed butter or another nut-free alternative. Make sure to check that your crispy rice cereal is also nut-free if you have allergies.
Which is better: maple syrup or honey?
Both sweeteners work beautifully, but maple syrup provides a subtle caramel flavor while honey gives a floral sweetness. Choose whichever you love most or have on hand—either way, your Healthy No-Bake Chocolate Peanut Butter Crunch Bars will be delicious.
Can I use milk or semi-sweet chocolate instead of dark chocolate?
Definitely! While dark chocolate offers a richer, less sweet flavor and more antioxidants, milk or semi-sweet chocolate chips work just as well if you prefer a sweeter topping.
How do I make these gluten-free?
Simply use a certified gluten-free crispy rice cereal. All other ingredients in this recipe are naturally gluten-free, so you can enjoy these bars worry-free.
Can I add mix-ins like nuts or dried fruit?
Yes! Feel free to stir in chopped nuts, seeds, or even dried cranberries for extra texture and flavor. Just keep the ratios similar so the bars hold together nicely.
Final Thoughts
These Healthy No-Bake Chocolate Peanut Butter Crunch Bars are a game changer for anyone who loves a sweet treat but wants to keep things wholesome and hassle-free. Give them a try, and you’ll see why they’re a staple in my kitchen—you might just find yourself making a double batch next time!
Print
Healthy No-Bake Chocolate Peanut Butter Crunch Bars Recipe
- Total Time: 1 hour 10 minutes (including 1 hour chilling)
- Yield: 16 bars 1x
- Diet: Vegetarian
Description
These Healthy No-Bake Chocolate Peanut Butter Crunch Bars are a delicious and wholesome snack perfect for satisfying your sweet tooth without turning on the oven. Combining natural peanut butter, crispy rice cereal, and rich dark chocolate, these bars offer a perfect balance of crunch and creaminess with just a hint of sea salt for extra flavor. Easy to prepare in just 10 minutes plus chilling time, they are ideal for busy days and make a great gluten-free, vegetarian treat loved by all ages.
Ingredients
Peanut Butter Mixture
- 1 cup natural peanut butter (creamy or crunchy)
- 1/2 cup maple syrup or honey
- 1/4 cup coconut oil
- 1 teaspoon vanilla extract
- 1/4 teaspoon salt
Cereal
- 2 1/2 cups crispy rice cereal (gluten-free if needed)
Chocolate Topping
- 1 cup dark chocolate chips
- 1 tablespoon coconut oil (for melting chocolate)
- Flaky sea salt for topping (optional)
Instructions
- Prepare the Pan: Line an 8×8-inch pan with parchment paper to prevent sticking and set aside for easy removal of bars later.
- Melt Peanut Butter Mixture: In a medium saucepan over low heat, combine the peanut butter, maple syrup (or honey), and 1/4 cup coconut oil. Stir continuously until the mixture becomes smooth and fully melted, about 2 to 3 minutes.
- Add Flavorings: Remove the saucepan from heat and stir in the vanilla extract and salt. This enhances the flavor and balances the sweetness.
- Combine with Cereal: Gently fold in the crispy rice cereal, ensuring every bit is evenly coated with the peanut butter mixture, giving the bars their signature crunch.
- Set the Base Layer: Press the coated cereal mixture firmly and evenly into the prepared pan using a spatula or your hands for a compact base.
- Melt Chocolate: In a small microwave-safe bowl or using a double boiler, melt the dark chocolate chips together with 1 tablespoon of coconut oil until smooth and glossy.
- Chocolate Layer: Pour the melted chocolate over the peanut butter layer and spread it evenly with a spatula for a smooth finish.
- Add Toppings: Sprinkle flaky sea salt over the chocolate layer if desired to add a subtle salty contrast.
- Chill and Set: Place the pan in the refrigerator for at least 1 to 2 hours until the bars are firm and easy to cut.
- Serve and Store: Once set, lift the bars out of the pan, cut into 16 squares, and store them in the refrigerator. For longer shelf life, keep them in the freezer.
Notes
- Use gluten-free crispy rice cereal to make this recipe fully gluten-free.
- For a nut-free alternative, substitute peanut butter with almond butter or sunflower seed butter.
- These bars keep well refrigerated for up to a week and can be frozen for up to 2 months.
- Adjust sweetness by using maple syrup or honey according to your taste preference.
- Flaky sea salt topping is optional but enhances the flavor contrast beautifully.
- Prep Time: 10 minutes
- Cook Time: 0 minutes
- Category: Snack, Dessert
- Method: No-Bake
- Cuisine: American
Nutrition
- Serving Size: 1 bar
- Calories: 180
- Sugar: 8g
- Sodium: 90mg
- Fat: 12g
- Saturated Fat: 5g
- Unsaturated Fat: 6g
- Trans Fat: 0g
- Carbohydrates: 15g
- Fiber: 2g
- Protein: 4g
- Cholesterol: 0mg


