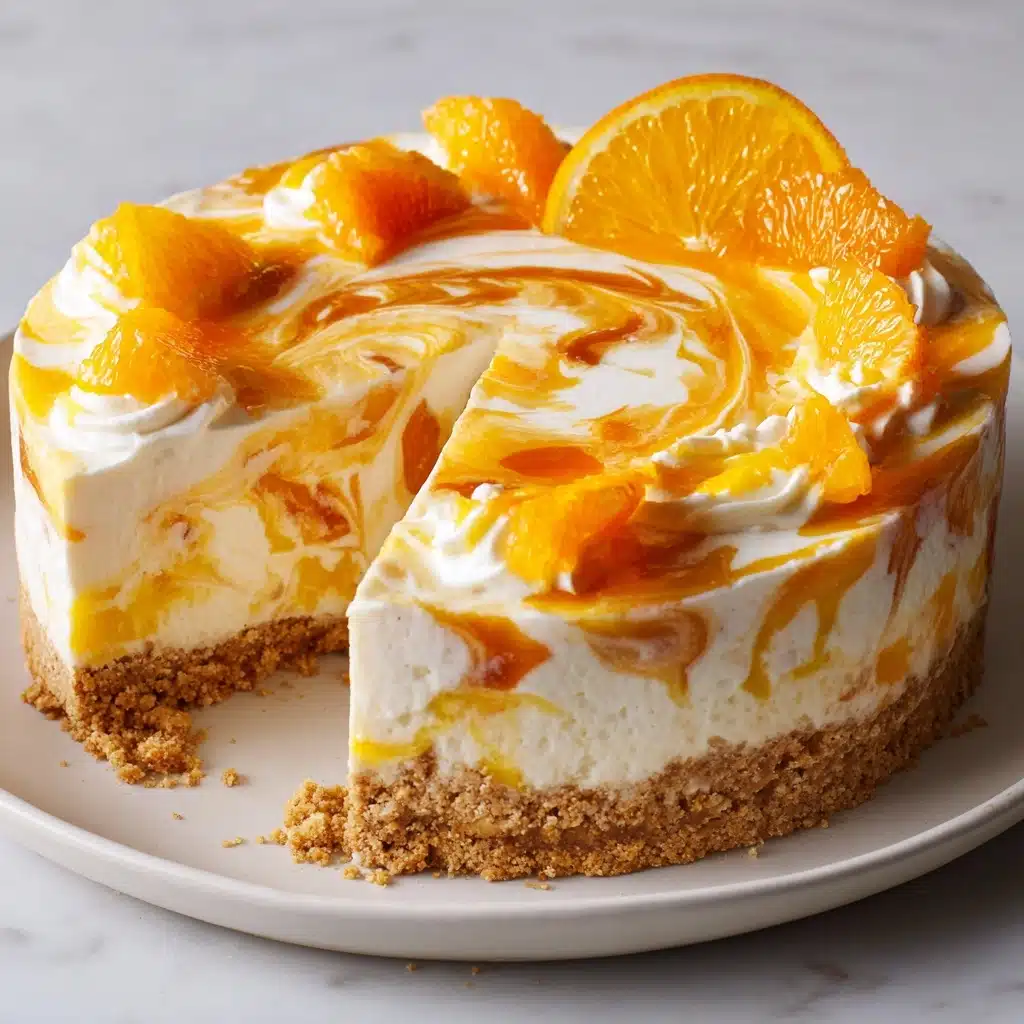
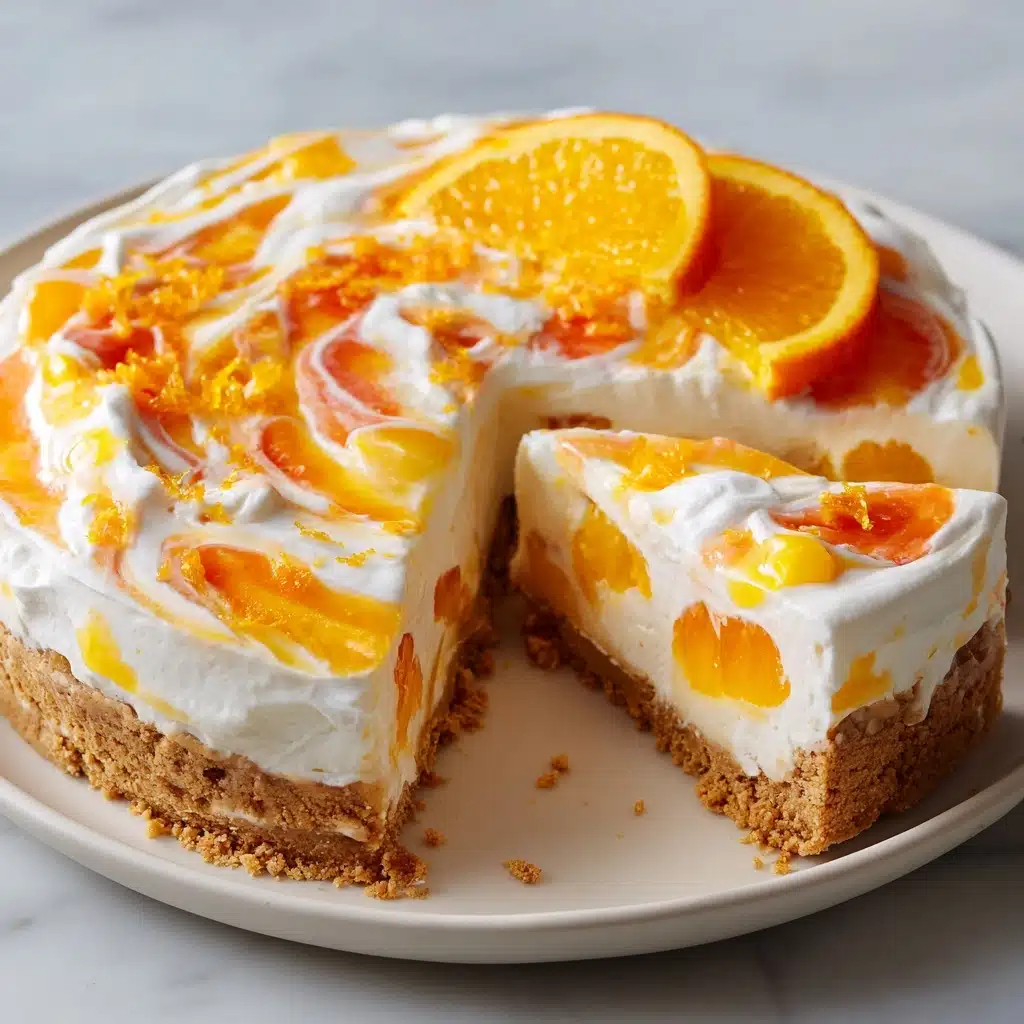
No-Bake Orange Creamsicle Cheesecake Recipe
If a dreamy creamsicle and a creamy cheesecake had a delicious summer baby, it would undoubtedly be this No-Bake Orange Creamsicle Cheesecake. With its vibrant citrus flavor, luscious texture, and absolutely no need to turn on the oven, this treat instantly becomes the centerpiece of any gathering. Whether you’re seeking a light and refreshing finish to a family cookout or simply need a dose of nostalgia with every bite, this cheesecake delivers those classic orange-and-vanilla vibes in the most delightful way. No fuss, maximum flavor, and pure joy on every plate—that’s the magic of No-Bake Orange Creamsicle Cheesecake!
Ingredients You’ll Need
Every ingredient for this No-Bake Orange Creamsicle Cheesecake has a special role—some bringing creamy richness, others lending that zesty citrus pop. The simplicity is part of the charm; when these ingredients come together, they create something spectacularly fun and flavorful.
- Graham cracker crumbs: The crumb base brings a toasty, buttery crunch that perfectly contrasts the creamy filling.
- Melted butter: Helps the graham crust stick together while adding a rich, classic flavor.
- Granulated sweetener (or sugar): Just a touch sweetens the crust and balances the tangy filling.
- Cream cheese (softened): The rich and creamy star that gives the cheesecake its signature lusciousness—full-fat works best!
- Powdered sugar: Dissolves effortlessly into the filling, making every bite smooth and sweet.
- Vanilla extract: Adds that cozy ice cream note, tying the citrus and cream together beautifully.
- Orange zest: A little goes a long way, delivering fresh, aromatic bursts of orange flavor.
- Orange juice: Gives the cheesecake its juicy, sunshine-bright tang.
- Orange gelatin (Jell-O): Delivers unbeatable flavor and ensures the filling sets perfectly without baking.
- Boiling water: Needed to dissolve the gelatin before blending it into the creamy mix.
- Heavy whipping cream (whipped): Folded in gently for a dreamy, cloud-like texture that defines this cheesecake.
How to Make No-Bake Orange Creamsicle Cheesecake
Step 1: Make the Crust
Start by combining the graham cracker crumbs, melted butter, and a little sweetener in a mixing bowl. Blend everything together until the mixture resembles wet sand—it should clump easily when pressed. Transfer this mixture to a 9-inch springform pan or pie dish, and use the back of a spoon (or your fingers) to press it evenly across the bottom. Chill the crust while you move on to the creamy filling; a cold crust ensures better structure and a satisfying bite.
Step 2: Dissolve the Gelatin
In a small bowl, whisk together the orange gelatin powder and boiling water until it’s completely dissolved. Let this cool down to room temperature. You want it liquid and pourable, but not set—this will blend seamlessly into the cheesecake later, giving that lovely creamsicle flavor and a perfect, sliceable texture.
Step 3: Whip the Cream
In a separate bowl (make sure it’s cold!), beat the heavy cream on high speed until you get stiff peaks. This step is crucial for that dreamy, whipped consistency that makes a no-bake cheesecake irresistible. Be gentle—overwhipping can turn your cream grainy.
Step 4: Make the Orange Cream Filling
In a large bowl, beat the softened cream cheese until it’s silky smooth—no lumps allowed! Add the powdered sugar, vanilla extract, orange zest, and orange juice, blending until the mixture is thick, creamy, and flecked with vibrant orange bits. Now, slowly drizzle in the cooled gelatin, mixing well so it’s evenly incorporated. Finally, gently fold in the whipped cream—use a spatula and a light touch to keep things airy and fluffy.
Step 5: Assemble and Chill
Spoon the orange cream filling over your prepared graham crust, smoothing the top with a spatula or the back of a spoon. Pop your pan into the refrigerator and let it chill for at least 6 hours, or ideally overnight. This is when the magic happens—the No-Bake Orange Creamsicle Cheesecake sets up to that perfect, sliceable consistency.
Step 6: Garnish and Serve
When you’re ready to serve, run a thin knife around the edges and carefully release the cheesecake from the pan. Top with extra orange zest, a billow of whipped cream, fresh orange slices, or all three! Each garnish enhances the look and taste, setting the stage for that iconic creamsicle experience in every bite.
How to Serve No-Bake Orange Creamsicle Cheesecake
Garnishes
The easiest way to dress up your No-Bake Orange Creamsicle Cheesecake is with gorgeous, zesty garnishes. Sprinkle on extra orange zest for a citrusy punch, swirl on dollops of vanilla whipped cream, or crown each slice with thin orange segments or curls of candied peel. The contrast of creamy filling and vibrant topping is pure joy.
Side Dishes
Keep it summery with some fresh berries—strawberries, raspberries, or blueberries pair beautifully and add a pop of color to your dessert plate. Alternatively, a crisp iced tea or cold brew coffee on the side matches the refreshing vibe of this cheesecake, making every bite feel extra special.
Creative Ways to Present
This dessert shines as a showstopper, but you can get playful by making mini cheesecakes in jars for picnics or parties, or serving it in parfait glasses with layers of extra graham crust and citrus segments. Don’t be afraid to have fun; the No-Bake Orange Creamsicle Cheesecake is as versatile in looks as it is in flavor!
Make Ahead and Storage
Storing Leftovers
Cover any leftover No-Bake Orange Creamsicle Cheesecake tightly with plastic wrap or transfer slices to an airtight container. It will stay fresh and dreamy for up to 4 days in your refrigerator—the crust holds up beautifully, and the filling remains heavenly smooth.
Freezing
If you want to store it longer, good news! You can freeze this cheesecake. Wrap individual slices or the whole cheesecake securely in plastic wrap and then aluminum foil. Freeze for up to one month; just thaw overnight in the fridge before serving for best texture.
Reheating
No need to reheat this make-ahead masterpiece! In fact, keeping it cold is key to getting those clean, creamy slices. If you’ve frozen your cheesecake, make sure you give it enough time to thaw slowly in the fridge before enjoying.
FAQs
Can I use low-fat cream cheese instead of full-fat?
You can, but the texture will be lighter and slightly less rich. For the classic, indulgent texture of a No-Bake Orange Creamsicle Cheesecake, full-fat cream cheese is highly recommended.
What if I only have regular (not instant) orange gelatin?
As long as you dissolve the gelatin in boiling water and let it cool before using, regular orange gelatin works perfectly well. Instant or not, just make sure it’s fully dissolved and liquid before adding to the filling.
Is it possible to substitute lemon for orange?
Absolutely! Lemon zest and juice will yield a bright, tangy twist, though the final flavor will be different. For the nostalgic creamsicle effect, orange is the way to go, but lemon works in a pinch.
Can I make this cheesecake vegan?
With a few substitutions (dairy-free cream cheese and plant-based whipping cream, plus vegan gelatin), you can craft a vegan version! Texture and flavor may vary, so taste and adjust as you go.
How do I know when the cheesecake is fully set?
After chilling for at least 6 hours, the No-Bake Orange Creamsicle Cheesecake should be firm to the touch and hold its shape when sliced. For picture-perfect results, let it chill overnight.
Final Thoughts
Indulge in summer nostalgia and creamy citrus bliss in every bite—there’s simply nothing quite like a No-Bake Orange Creamsicle Cheesecake! With just a handful of easy ingredients and truly zero fuss, you’re only hours away from a dessert that’ll wow everyone at your table. Give it a try, share a slice, and let the citrus sunshine brighten your day!
Print
No-Bake Orange Creamsicle Cheesecake Recipe
- Total Time: 6 hours 20 minutes
- Yield: 10 servings 1x
- Diet: Non-Vegetarian
Description
Indulge in the refreshing flavors of summer with this easy no-bake orange creamsicle cheesecake. A creamy, citrusy delight that’s perfect for any occasion.
Ingredients
For the crust:
- 1 ½ cups graham cracker crumbs
- 1/3 cup melted butter
- 2 tablespoons granulated sweetener (or sugar)
For the filling:
- 16 oz cream cheese, softened
- 1/2 cup powdered sugar
- 1 teaspoon vanilla extract
- 1 tablespoon orange zest
- 2 tablespoons orange juice
- 1 (3 oz) package orange gelatin (Jell-O)
- 1/2 cup boiling water
- 1 cup heavy whipping cream, whipped to stiff peaks
Instructions
- Prepare the crust: In a medium bowl, mix graham cracker crumbs, melted butter, and sweetener until evenly combined. Press into the bottom of a 9-inch springform pan or pie dish. Chill in the refrigerator while preparing the filling.
- Prepare the filling: In a small bowl, dissolve the orange gelatin in the boiling water. Let it cool to room temperature but do not let it set. In a large bowl, beat the cream cheese until smooth. Add powdered sugar, vanilla, orange zest, and orange juice, and beat until well combined. Slowly mix in the cooled gelatin. Gently fold in the whipped cream until the mixture is smooth and fluffy.
- Assemble the cheesecake: Pour the filling over the prepared crust and smooth the top. Refrigerate for at least 6 hours or overnight until fully set. Before serving, optionally garnish with more orange zest, whipped cream, or orange slices.
Notes
- Use full-fat cream cheese for the best texture.
- For a stronger orange flavor, add a few drops of natural orange extract.
- This dessert keeps well in the fridge for up to 4 days.
- Prep Time: 20 minutes
- Category: Dessert
- Method: No-Bake
- Cuisine: American
Nutrition
- Serving Size: 1 slice
- Calories: 370
- Sugar: 14g
- Sodium: 220mg
- Fat: 28g
- Saturated Fat: 17g
- Unsaturated Fat: 9g
- Trans Fat: 0g
- Carbohydrates: 24g
- Fiber: 0g
- Protein: 5g
- Cholesterol: 90mg


