No-Knead Artisan Bread Recipe
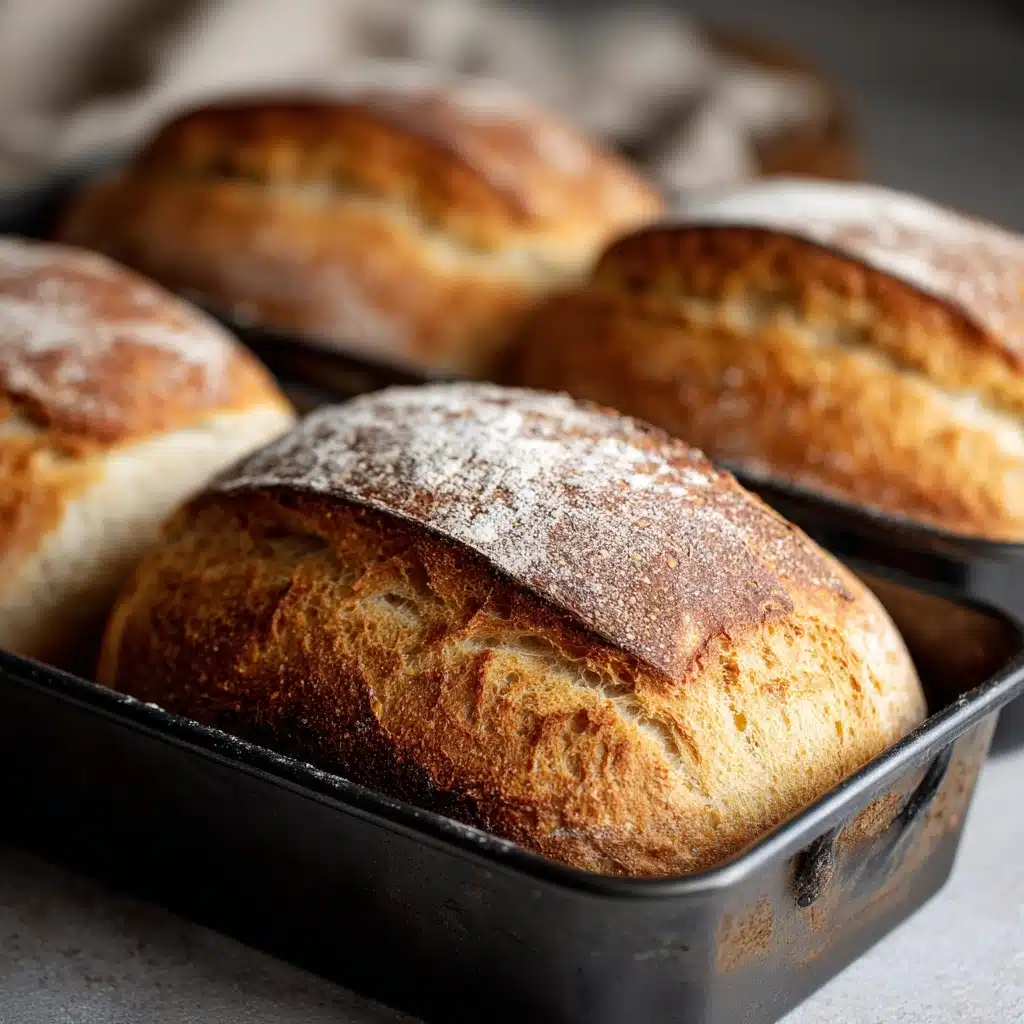
There’s almost something magical about pulling a loaf of No-Knead Artisan Bread fresh from your oven—crackling as it cools, the gorgeous golden crust promising a pillowy center. This bread uses just a handful of pantry staples, yet delivers the same rustic look and soulful flavor you’d find in a true European bakery. And guess what? Without the need to knead, you’ll barely have to lift a finger to make it happen! If you’ve ever dreamed of making bakery-quality bread at home without fuss, this is the recipe that will make you absolutely fall in love with the process.
Ingredients You’ll Need
One of the best parts about No-Knead Artisan Bread is the beautifully short ingredient list—each one is easy to find and plays a critical role. It’s a masterclass in how simple ingredients transform, with every component bringing something unique to the loaf’s character.
- All-purpose flour: The backbone of the loaf, this flour creates a soft yet chewy crumb that’s perfect for soaking up butter or olive oil.
- Salt: Absolutely essential—salt seasons the dough and highlights the subtle flavors developed during the slow rise.
- Active dry yeast: This tiny amount is enough to give the bread its airy lift and signature holes, thanks to the long fermentation.
- Warm water (about 110°F): Brings all the elements together and activates the yeast, making the dough perfectly sticky and moist.
- Cornmeal or extra flour (for dusting): Adds that classic rustic touch and prevents sticking—plus, it gives the bottom crust a little extra crunch.
How to Make No-Knead Artisan Bread
Step 1: Combine the Dough
Start by grabbing your largest mixing bowl and adding the flour, salt, and yeast. Give them a gentle stir before pouring in the warm water. Use a wooden spoon or rubber spatula to mix until the dough just comes together—it should look like a shaggy, sticky mess, and that’s perfect! Don’t worry about lumps or dry patches; they’ll work themselves out as the dough rests and ferments.
Step 2: Let It Rise
Now, cover the bowl tightly with plastic wrap or a clean, damp kitchen towel. Find a cozy spot on your counter and let the dough rest at room temperature for 12 to 18 hours. During this time, the dough will double in size and become dotted with big, beautiful bubbles—this slow fermentation is what gives No-Knead Artisan Bread its depth of flavor and gorgeous open crumb.
Step 3: Shape the Dough
Flour your work surface generously, then tip the risen dough onto it. Dust your hands with flour (it’s sticky!) and gently shape the dough into a loose ball. There’s no need to knead or be precise—simplicity is key. Let the dough rest for about 30 minutes while you tackle the next step.
Step 4: Preheat the Oven and Dutch Oven
Place your empty Dutch oven with its lid inside your oven and start preheating both to 450°F. This step is the secret to achieving that artisan-style crust—the steamy, screaming-hot pot will turn your kitchen into a mini-bakery. Let it heat for the full 30 minutes while your dough is resting.
Step 5: Bake the Bread
When everything’s ready, carefully remove the hot Dutch oven. Place your dough ball onto a square of parchment paper, sprinkle the top with a little extra flour or cornmeal, and then lower the whole thing (using the parchment edges) into the pot. Cover and bake for 30 minutes. After that, remove the lid and let it go for another 10 to 15 minutes, until the crust turns a deep, irresistible golden brown. Your kitchen will smell heavenly by now.
Step 6: Cool and Slice
Lift your bread out and transfer it to a wire rack. For best results (and to avoid gummy slices), let the No-Knead Artisan Bread cool for at least half an hour. This wait is tough, but it’s worth every minute. Now it’s time to slice, serve, and savor!
How to Serve No-Knead Artisan Bread

Garnishes
This bread sings all on its own, but don’t hesitate to give it a flavor boost. Swirl the top with a bit of butter, brush on olive oil with a sprinkle of flaky sea salt, or rub a fresh garlic clove over the warm crust for a savory twist. If you’re feeling adventurous, a dusting of Parmesan cheese or fresh chopped herbs right after baking takes things to the next level.
Side Dishes
No-Knead Artisan Bread is the ultimate companion for so many meals. Pair it with hearty soups and stews to mop up every last spoonful, or serve it alongside fresh salads for a simple yet satisfying lunch. It’s also fabulous next to a cheese and charcuterie board, where its subtle tang provides the perfect counterpoint to sharp cheese or cured meats.
Creative Ways to Present
For a rustic get-together, slice the loaf thick and serve it piled in a bread basket, lined with a pretty cloth napkin. Or, make crostini by slicing and toasting on a grill pan, brushing with oil, and topping with tomatoes or roasted veggies. You can even hollow out the center and turn the bread into a bread bowl for piping hot soup or dips—always a showstopper!
No-Knead Artisan Bread: Make Ahead and Storage
Storing Leftovers
Keep your loaf fresher for longer by storing it in a paper bag or loosely wrapped in a clean kitchen towel at room temperature. This helps maintain the crust’s delightful texture and keeps the inside from drying out. Try to avoid sealed plastic containers, as they trap moisture and can make the crust soften prematurely—No-Knead Artisan Bread deserves to stay crisp!
Freezing
If you’d like to save some for later, slice the cooled loaf and wrap individual pieces in foil or plastic wrap, then tuck them all into a freezer-safe bag. This way, you can pull out just what you need for a quick snack or meal. Homemade bread will keep its flavor and texture best if used within a month from the freezer.
Reheating
To revive that fresh-baked taste, preheat your oven to 350°F and pop the thawed, unwrapped slices or loaf right on the rack for about 10 minutes. You’ll rediscover that glorious crust and soft interior. In a pinch, even a toaster will do the trick for slices—just be sure not to overdo it so the bread doesn’t dry out.
FAQs
Can I use whole wheat flour instead of all-purpose?
Absolutely! You can substitute up to half the flour with whole wheat for a nutty, rustic flavor. Just know that your loaf might be a little denser, and you may need to add an extra tablespoon or two of water to keep the dough sticky.
Do I really have to wait 12–18 hours for the dough to rise?
The long rise is what gives No-Knead Artisan Bread its wonderful texture and complex flavor. If you’re in a rush, you can try shortening the rise, but your bread won’t be quite as airy or flavorful. For best results, let time do its magic!
What if I don’t have a Dutch oven?
Don’t worry! You can use any heavy, oven-safe pot with a lid—like a cast iron pot or ovenproof casserole dish. The tight lid is important for trapping steam, which creates that signature crust.
Why is my dough so sticky? Did I do something wrong?
Sticky dough is a sign you’re on the right track. The high hydration is essential for the open crumb and chewy crust of No-Knead Artisan Bread. Just use well-floured hands and surfaces—it’ll all work out!
Can I add other flavors to the dough?
Absolutely! Try mixing in chopped fresh herbs, shredded cheese, olives, or roasted garlic after the first rise. Customizing your bread is part of the fun, and it’s a great way to make this recipe your own.
Final Thoughts
There’s nothing quite like the smell and sound of No-Knead Artisan Bread, still warm from the oven, inviting everyone to the table. This recipe is practically foolproof and offers a payoff far bigger than its humble ingredient list. Give it a try—even if you’ve never baked bread before—and let yourself enjoy the joy of homemade goodness, one crusty slice at a time.
Print
No-Knead Artisan Bread Recipe
- Total Time: 13 hours (including rise)
- Yield: 1 loaf 1x
- Diet: Vegan
Description
Learn how to make a delicious No-Knead Artisan Bread at home with this easy recipe. This crusty homemade bread requires minimal effort and is perfect for any occasion.
Ingredients
Dough:
- 3 cups all-purpose flour
- 1 ½ teaspoons salt
- ½ teaspoon active dry yeast
- 1 ½ cups warm water (about 110°F)
Additional:
- cornmeal or extra flour for dusting
Instructions
- Prepare the Dough: In a large bowl, combine flour, salt, and yeast. Add warm water and mix until a sticky dough forms. Cover and let it rise for 12-18 hours.
- Shape the Dough: Turn out the risen dough onto a floured surface. Shape into a ball and let it rest.
- Preheat and Bake: Preheat a Dutch oven in the oven. Transfer the dough into the pot and bake covered, then uncovered until golden.
- Cool and Serve: Allow the bread to cool on a rack before slicing.
Notes
- Customize by adding herbs, cheese, or olives for different flavors.
- Store leftovers in a paper bag or loosely covered for up to 3 days.
- Prep Time: 10 minutes (plus rising time)
- Cook Time: 45 minutes
- Category: Bread
- Method: Baking
- Cuisine: European
Nutrition
- Serving Size: 1 slice (1/12 loaf)
- Calories: 130
- Sugar: 0g
- Sodium: 290mg
- Fat: 0.5g
- Saturated Fat: 0g
- Unsaturated Fat: 0g
- Trans Fat: 0g
- Carbohydrates: 27g
- Fiber: 1g
- Protein: 4g
- Cholesterol: 0mg


