Strawberry Cheesecake Lush Recipe
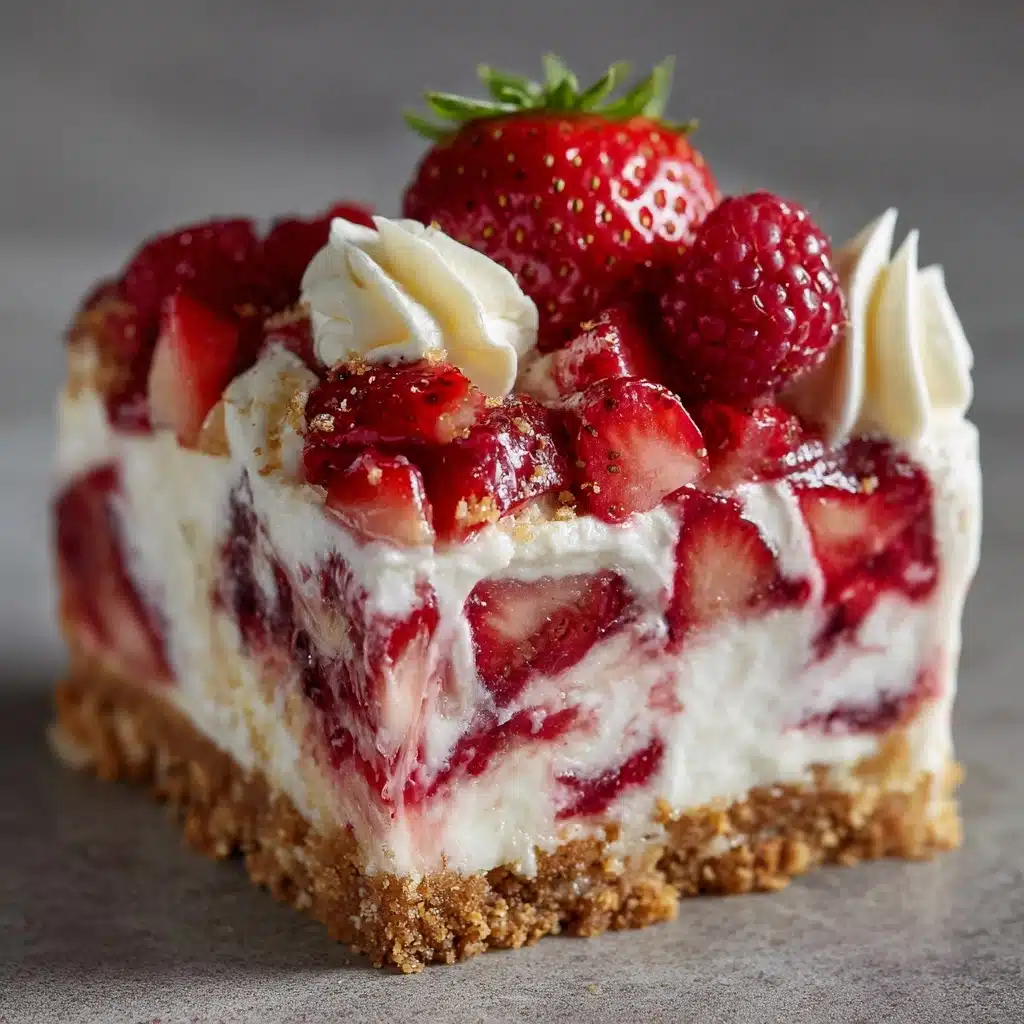
Looking for a show-stopping, fuss-free summer dessert? Strawberry Cheesecake Lush is as delightful to eat as it is beautiful to serve! Imagine layers of buttery Golden Oreo crust, pillowy cheesecake filling, fluffy pudding bursting with strawberries, and cloud-like whipped topping all nestled together. Each bite is creamy, fruity, and just the right amount of sweet—your guests won’t guess how easy it was to create such a dreamy, impressive treat.
Ingredients You’ll Need
This Strawberry Cheesecake Lush comes together with simple, familiar ingredients that each play a starring role. From the golden crunch of the cookie base to the luscious layers of berries and cream, every component adds to the dreamy texture and flavor.
- Golden Oreos (1 package, 14.3 oz, crushed): These cookies create a sweet, buttery foundation that’s different from the usual chocolate “lush” bases—plus, their vanilla flavor truly lets the strawberries shine.
- Unsalted butter (1/2 cup, melted): Butter brings the Oreo crumbs together for a crust that holds up under all those luscious layers.
- Cream cheese (1 package, 8 oz, softened): The star of the cheesecake layer, providing a rich tang and velvety smoothness.
- Powdered sugar (1 cup): Essential for sweetening the cream cheese filling without any grittiness.
- Vanilla extract (1 teaspoon): Adds lovely warmth and depth, bringing together all the creamy components.
- Whipped topping (1 container, 8 oz, like Cool Whip), divided: It keeps the dessert light and airy—don’t forget to divide, as you’ll use it in multiple layers!
- Instant cheesecake or vanilla pudding mix (2 packages, 3.4 oz each): These mixes create an ultra-silky pudding layer packed with classic cheesecake notes.
- Cold milk (2 1/2 cups): The secret to making the pudding perfectly thick and creamy—use ice-cold milk for best results.
- Fresh strawberries (2 cups, chopped): These add juicy bursts of berry flavor and gorgeous color throughout the dish.
- Additional strawberries for garnish: A few pretty berries on top take this lush to the next level visually and flavor-wise.
How to Make Strawberry Cheesecake Lush
Step 1: Make the Golden Oreo Crust
Start by crushing your Golden Oreos—either in a zip-top bag with a rolling pin or using a food processor for super-fine crumbs. Combine these with the melted butter in a medium bowl, making sure every crumb is coated for the perfect base. Press this mixture firmly and evenly into the bottom of a 9×13-inch dish. Pop the pan in the fridge to set while you tackle the next step; this helps the crust stay sturdy and buttery.
Step 2: Whip Up the Cream Cheese Layer
In a large bowl, beat your softened cream cheese until fluffy, then add powdered sugar and vanilla extract. Keep mixing until completely smooth and no lumps remain. Gently fold in 1 cup of the whipped topping, being careful not to deflate all that airiness. Carefully spread this dreamy cheesecake layer over the chilled crust, using a spatula to reach all the edges.
Step 3: Prepare the Strawberry Pudding Layer
In a separate bowl, whisk together the instant pudding mix and cold milk for 2 to 3 minutes until it thickens like mousse. Fold in another cup of whipped topping to make it light and creamy, then gently stir in the fresh chopped strawberries for juicy pops of color and flavor. Spread this luscious strawberry pudding layer evenly on top of the cream cheese layer.
Step 4: Finish with Whipped Topping
Spread the remaining whipped topping all over the top of the dessert in an even, cloud-like layer. Try to get it as smooth as possible to make those garnishes shine later. This final layer seals in all the creamy goodness below.
Step 5: Chill and Garnish
Cover your Strawberry Cheesecake Lush and refrigerate for at least 4 hours—or overnight, if you can resist! Chilling lets the layers set and marry their flavors. Just before serving, scatter plenty of fresh strawberries over the top for a vibrant, juicy crowd-pleaser.
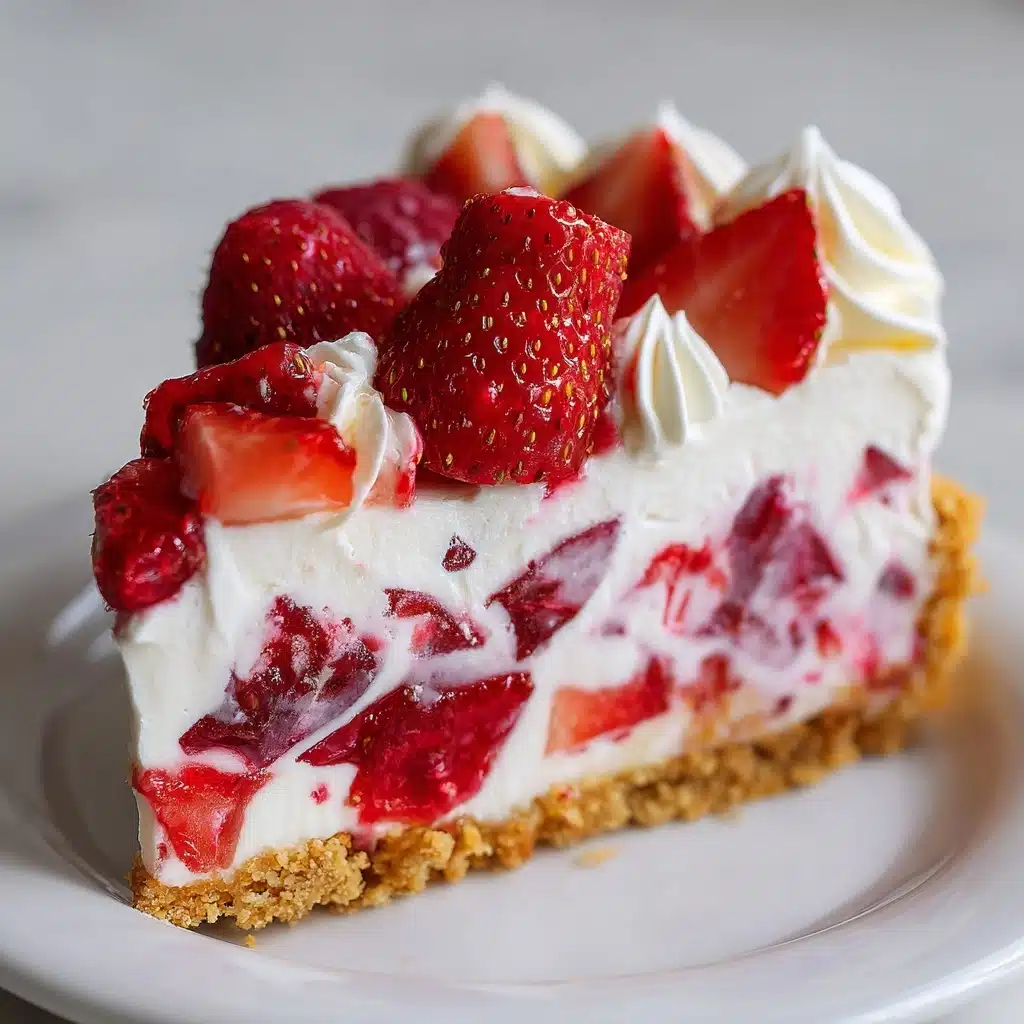
How to Serve Strawberry Cheesecake Lush
Garnishes
The simplest way to make your Strawberry Cheesecake Lush look extraordinary is with extra fresh strawberries. Slice or halve them and arrange in pretty patterns—think fans, roses, or scatter them for a rustic vibe. A sprinkle of crushed Golden Oreos or a drizzle of strawberry sauce adds glam, too. If you want to go all out, a few sprigs of mint lend a pop of green that’s photo-ready.
Side Dishes
Since this dessert is rich and creamy, it pairs well with something a little tart or bubbly. Serve alongside a fruit salad with citrus or a crisp glass of sparkling lemonade. For a party spread, set it out with other summer favorites like berry skewers, vanilla bean ice cream, or even a platter of chocolate-dipped pretzels for a salty-sweet twist.
Creative Ways to Present
Don’t limit yourself to the classic 9×13 dish! For individual serves, make your Strawberry Cheesecake Lush in small mason jars or clear cups to highlight those lovely layers. You can even make bite-sized portions using a muffin tin with cupcake liners. For holidays or special occasions, use cookie cutters to stamp out fun shapes before garnishing.
Make Ahead and Storage
Storing Leftovers
Leftover Strawberry Cheesecake Lush keeps beautifully in the refrigerator for up to 3 days. Cover the dish tightly with plastic wrap or store slices in airtight containers to keep the layers moist and prevent the strawberries from drying out. The flavors deepen as it sits, making those leftovers a little extra special the next day.
Freezing
If you want to freeze the dessert, it’s best to do so before adding fresh strawberries on top. Wrap the dish thoroughly with foil and plastic wrap, then freeze for up to 2 months. Thaw overnight in the fridge, add your garnishes, and enjoy! Just keep in mind that the texture may be a touch softer after freezing and thawing.
Reheating
This is strictly a chill-and-serve dessert—no reheating needed! In fact, it’s best served ice-cold straight from the fridge. If you find it a bit too firm after a stint in the freezer, let it soften for 10 to 15 minutes at room temperature before slicing.
FAQs
Can I use frozen strawberries instead of fresh?
You can use frozen strawberries for the pudding layer if fresh aren’t available, but be sure to thaw and pat them dry very well to avoid watering down your lush. For garnish, though, fresh strawberries provide the best look and texture.
What can I substitute for Golden Oreos?
If you can’t find Golden Oreos, vanilla wafer cookies or shortbread cookies make delicious alternatives for the crust. The key is to choose something sweet and buttery for that perfect base.
Can I make Strawberry Cheesecake Lush a day ahead?
Absolutely! In fact, letting the lush chill overnight helps the flavors meld and the layers set beautifully. Just keep it covered and add your strawberry garnish right before serving for the freshest look.
How do I prevent a soggy crust?
Make sure to press the buttered cookie crumbs down firmly and chill the crust while preparing the filling. For extra crunch, bake the crust at 350°F for 8 to 10 minutes and let it cool completely before adding any layers.
Is Strawberry Cheesecake Lush gluten free?
As written, this recipe isn’t gluten free due to the Golden Oreos and pudding mixes. However, if you use certified gluten-free vanilla sandwich cookies and pudding, you can create a delicious gluten-free version.
Final Thoughts
Treat yourself and your loved ones to the sweet, creamy magic of Strawberry Cheesecake Lush! It’s a guaranteed crowd-pleaser with all the flavors of classic cheesecake, just with a playful, no-bake twist. Whether for a potluck, birthday, or a surprise treat “just because,” this dessert is one you’ll find yourself making again and again—so go ahead, dig in and share the lush love!
Print
Strawberry Cheesecake Lush Recipe
- Total Time: 4 hours 25 minutes
- Yield: 12 servings 1x
- Diet: Vegetarian
Description
Indulge in the luscious layers of this no-bake Strawberry Cheesecake Lush, a delightful dessert perfect for any occasion. A buttery Oreo crust, creamy cheesecake layer, and a fruity pudding topping make this a refreshing and decadent treat.
Ingredients
Oreo Crust:
- 1 package (14.3 oz) Golden Oreos, crushed
- 1/2 cup unsalted butter, melted
Cheesecake Layer:
- 1 package (8 oz) cream cheese, softened
- 1 cup powdered sugar
- 1 teaspoon vanilla extract
- 1 container (8 oz) whipped topping, divided
Strawberry Pudding Topping:
- 2 packages (3.4 oz each) instant cheesecake or vanilla pudding mix
- 2 1/2 cups cold milk
- 2 cups fresh strawberries, chopped
- additional strawberries for garnish
Instructions
- Oreo Crust: Mix crushed Oreos with melted butter, press into dish.
- Cheesecake Layer: Beat cream cheese, sugar, and vanilla until smooth. Fold in 1 cup whipped topping, spread over crust.
- Strawberry Pudding Topping: Whisk pudding mix with milk until thickened. Fold in whipped topping and strawberries, spread over cheesecake layer.
- Chill for at least 4 hours. Garnish with strawberries before serving.
Notes
- Use fresh, ripe strawberries for best results.
- For a crunchier crust, bake before layering.
- Best served cold and can be made ahead.
- Prep Time: 25 minutes
- Cook Time: 0 minutes (chill only)
- Category: Dessert
- Method: No-Bake
- Cuisine: American
Nutrition
- Serving Size: 1 slice
- Calories: 370
- Sugar: 29g
- Sodium: 290mg
- Fat: 21g
- Saturated Fat: 11g
- Unsaturated Fat: 9g
- Trans Fat: 0g
- Carbohydrates: 39g
- Fiber: 1g
- Protein: 4g
- Cholesterol: 35mg


