Thumbprint Cookies Recipe
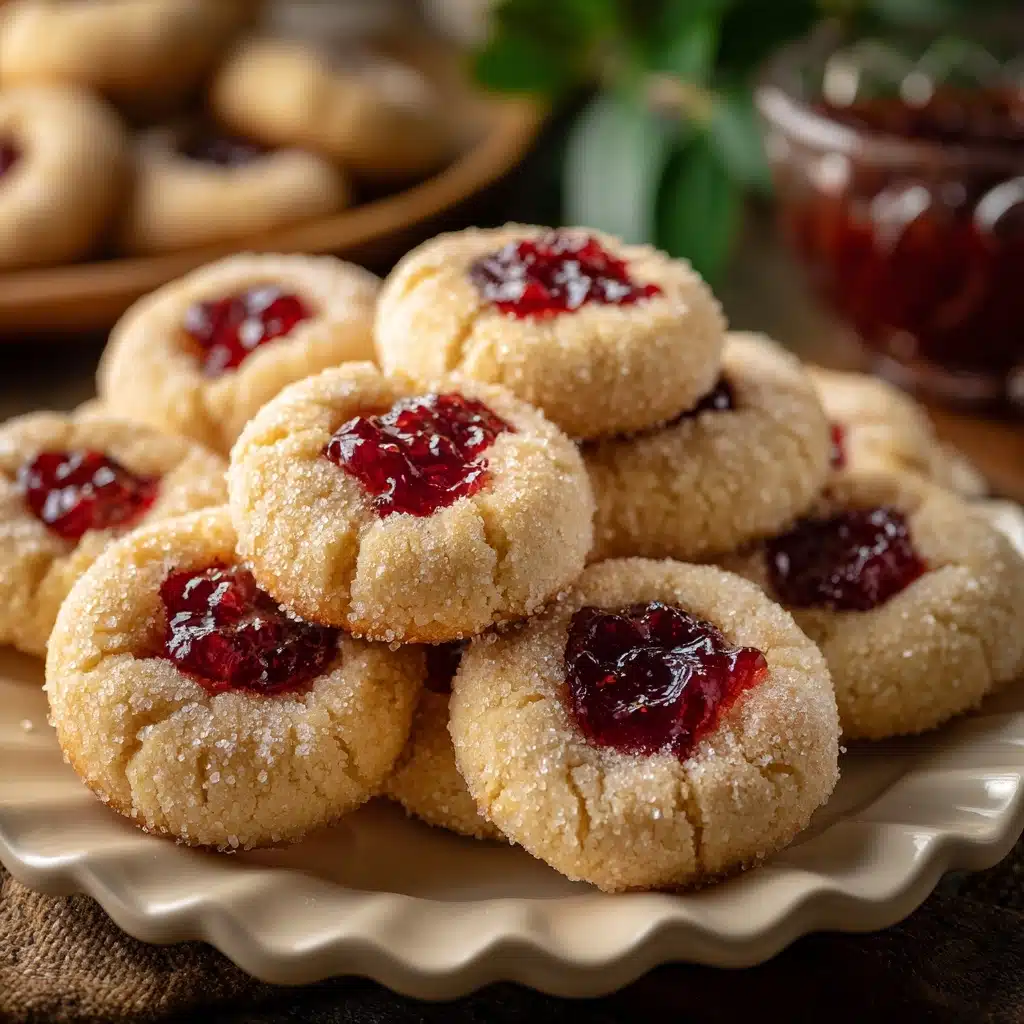
Buttery, melt-in-your-mouth Thumbprint Cookies are those irresistible treats you just can’t stop reaching for—each bite is a perfect harmony of soft, rich cookie and sweet, jewel-toned jam. Whether you’re baking for the holidays or just craving something comforting and nostalgic, these cookies look absolutely stunning and taste even better. With a tender crumb and a burst of vibrant fruit flavor in every thumbprint, they’re as fun to make as they are to eat. I promise, once you master this recipe, you’ll want to whip up a batch of Thumbprint Cookies for every occasion!
Ingredients You’ll Need
The beauty of these cookies is how a handful of pantry staples transform into a showstopper dessert. Each ingredient plays a starring role in building the signature flavor, texture, and look of classic Thumbprint Cookies—so don’t skimp on quality or care!
- Unsalted butter (1 cup, softened): The foundation of a rich, tender crumb; make sure it’s room temperature for easy creaming.
- Granulated sugar (2/3 cup): Adds just the right amount of sweetness and helps the cookies hold their shape.
- Large egg yolk (1): Gives the dough richness and a beautifully soft texture.
- Vanilla extract (1 teaspoon): Infuses the cookies with warm, aromatic flavor—pure vanilla works best.
- All-purpose flour (2 cups): Provides structure while keeping the cookies delicately light.
- Salt (1/4 teaspoon): Enhances all the flavors and balances the sweetness.
- Fruit preserves or jam (1/2 cup): Choose your favorites—raspberry, strawberry, or apricot—for bright, colorful centers.
- Powdered sugar (optional, for dusting): A light dusting makes them look extra festive and adds a touch of elegance.
How to Make Thumbprint Cookies
Step 1: Prep the Oven and Baking Sheet
Start by preheating your oven to 350°F. Line a baking sheet with parchment paper—this step keeps your cookies from sticking and makes cleanup a breeze. Setting everything up first means you can move smoothly from one step to the next.
Step 2: Cream Butter and Sugar
In a large bowl, beat together the softened butter and granulated sugar until the mixture is pale and fluffy. This not only aerates the dough for a lighter cookie but also dissolves the sugar, giving you a smooth base.
Step 3: Add Egg Yolk and Vanilla
Mix in the egg yolk and vanilla extract, blending until fully incorporated. The yolk enriches the dough while the vanilla adds that irresistible homemade aroma and depth.
Step 4: Mix in Dry Ingredients
Add the flour and salt to the bowl, stirring until a soft, cohesive dough forms. If your dough feels too sticky, you can chill it for about 30 minutes—this step makes shaping so much easier.
Step 5: Shape and Indent Cookies
Scoop out tablespoon-sized portions and roll them into 1-inch balls, placing them about 2 inches apart on your prepared baking sheet. Use your thumb or the back of a spoon to gently press an indentation into the center of each dough ball—this is where the magic happens!
Step 6: Fill with Jam
Spoon about 1/2 teaspoon of your chosen fruit preserves or jam into each indentation. Don’t worry if it looks a bit full; the jam settles perfectly as the cookies bake.
Step 7: Bake and Cool
Bake for 12 to 14 minutes, or until the edges turn a lovely golden color. Let the cookies rest on the baking sheet for 5 minutes before transferring them to a wire rack to cool completely. If you’re feeling fancy, dust with powdered sugar once they’re cool.
How to Serve Thumbprint Cookies

Garnishes
For that final flourish, a gentle dusting of powdered sugar gives your Thumbprint Cookies a snow-kissed look, making them extra inviting on any cookie platter. You can also sprinkle a few finely chopped nuts or add a tiny zest of lemon for a pop of brightness.
Side Dishes
Pair these cookies with a hot cup of tea, fresh coffee, or even a glass of cold milk for the ultimate comfort. They’re a delightful addition to dessert spreads, especially when served alongside other classic treats like shortbread or biscotti.
Creative Ways to Present
Arrange your Thumbprint Cookies on a tiered cake stand for a dramatic tea-time centerpiece, or wrap a few in clear cellophane bags tied with ribbon for sweet homemade gifts. Mixing different jam flavors in one batch creates a gorgeous, colorful mosaic that looks so tempting on any table.
Make Ahead and Storage
Storing Leftovers
Keep your leftover cookies fresh by storing them in an airtight container at room temperature. They stay soft for up to 4 days and are just as delicious on day four as they are fresh out of the oven!
Freezing
You can freeze Thumbprint Cookies with or without the jam centers. If you freeze them already filled, separate layers with parchment paper to avoid sticking. Let them come to room temperature before serving for the best taste and texture.
Reheating
If you prefer your cookies slightly warm, pop them in a 300°F oven for 2–3 minutes. This refreshes their texture and gives the jam a lovely, gooey quality—just like freshly baked!
FAQs
Can I use different types of jam in one batch?
Absolutely! Mixing raspberry, strawberry, apricot, or even blueberry preserves gives your Thumbprint Cookies a vibrant look and a medley of flavors. It’s a great way to use up those last bits of jam in your fridge, too.
Why did my cookies spread too much?
If your cookies spread more than you’d like, the dough might have been too warm. Next time, chill the dough for 30 minutes before shaping—this helps the cookies hold their shape beautifully as they bake.
Can I make the dough ahead of time?
Yes! You can prepare the dough up to two days in advance, wrap it tightly, and store it in the refrigerator. Let it soften for a few minutes at room temperature before rolling and baking.
Do Thumbprint Cookies work with gluten-free flour?
They sure do! Substitute your favorite cup-for-cup gluten-free flour blend for the all-purpose flour. The texture may be slightly different, but you’ll still get delicious results.
How do I keep the jam from running out of the cookies?
Use a thick jam or fruit preserve and avoid overfilling the indentations. If your jam is very runny, simmer it for a few minutes to thicken before filling your cookies.
Final Thoughts
If you’ve never baked Thumbprint Cookies at home, now’s the time to treat yourself! These charming little cookies are as delightful to make as they are to eat, and they always bring a burst of color and joy to any gathering. Give them a try—your cookie jar (and everyone around you) will thank you!
Print
Thumbprint Cookies Recipe
- Total Time: 29 minutes
- Yield: 24 cookies 1x
- Diet: Vegetarian
Description
Delight in these classic Thumbprint Cookies, buttery and tender, filled with your favorite fruit preserves. Perfect for holiday gatherings or an everyday sweet treat, these cookies balance a rich, soft dough with a sweet, fruity center.
Ingredients
Cookie Dough
- 1 cup unsalted butter (softened)
- 2/3 cup granulated sugar
- 1 large egg yolk
- 1 teaspoon vanilla extract
- 2 cups all-purpose flour
- 1/4 teaspoon salt
Filling and Finishing
- 1/2 cup fruit preserves or jam (such as raspberry, strawberry, or apricot)
- Optional powdered sugar for dusting
Instructions
- Preheat and Prepare Baking Sheet: Preheat your oven to 350°F (175°C) and line a baking sheet with parchment paper to prevent sticking and ensure easy cleanup.
- Cream Butter and Sugar: In a large bowl, use a mixer to cream together the softened butter and granulated sugar until the mixture is light and fluffy, which creates a tender cookie texture.
- Add Egg Yolk and Vanilla: Beat in the egg yolk and vanilla extract until fully incorporated to add richness and aroma to the dough.
- Mix Dry Ingredients: Gradually add the all-purpose flour and salt to the wet mixture, stirring until a soft, cohesive dough forms without overmixing to keep the cookies tender.
- Shape Dough Balls: Scoop and roll the dough into 1-inch balls, placing them about 2 inches apart on the prepared baking sheet to allow space for spreading.
- Create Thumbprint Indentations: Use your thumb or the back of a spoon to gently press an indentation into the center of each cookie ball, forming a well for the jam filling.
- Fill with Jam: Spoon about 1/2 teaspoon of your chosen fruit preserves into each indentation, ensuring the jam stays within the center.
- Bake the Cookies: Bake the cookies for 12 to 14 minutes or until the edges just start to turn a light golden color, indicating they are done but still soft inside.
- Cool the Cookies: Allow the cookies to cool on the baking sheet for 5 minutes before transferring them to a wire rack to cool completely, which helps them set properly.
- Optional Dusting: Once cooled, dust with powdered sugar if desired for a festive finish and added sweetness.
Notes
- Experiment with different jams like raspberry, apricot, or strawberry for colorful variations.
- If the dough feels too soft to handle, chill it for 30 minutes before rolling for easier shaping.
- Store finished cookies in an airtight container at room temperature for up to 4 days to maintain freshness.
- Prep Time: 15 minutes
- Cook Time: 14 minutes
- Category: Dessert
- Method: Baking
- Cuisine: American
Nutrition
- Serving Size: 1 cookie
- Calories: 130
- Sugar: 6 g
- Sodium: 40 mg
- Fat: 7 g
- Saturated Fat: 4 g
- Unsaturated Fat: 3 g
- Trans Fat: 0 g
- Carbohydrates: 15 g
- Fiber: 0 g
- Protein: 1 g
- Cholesterol: 20 mg


